
Meedio Helpdesk
Queues
In this article you will learn how to set up, share and join a queue. You will also learn how to manage your queues and obtain your queue statistics.
Create Queues
Sign into Meedio
- If help needed refer to Sign in
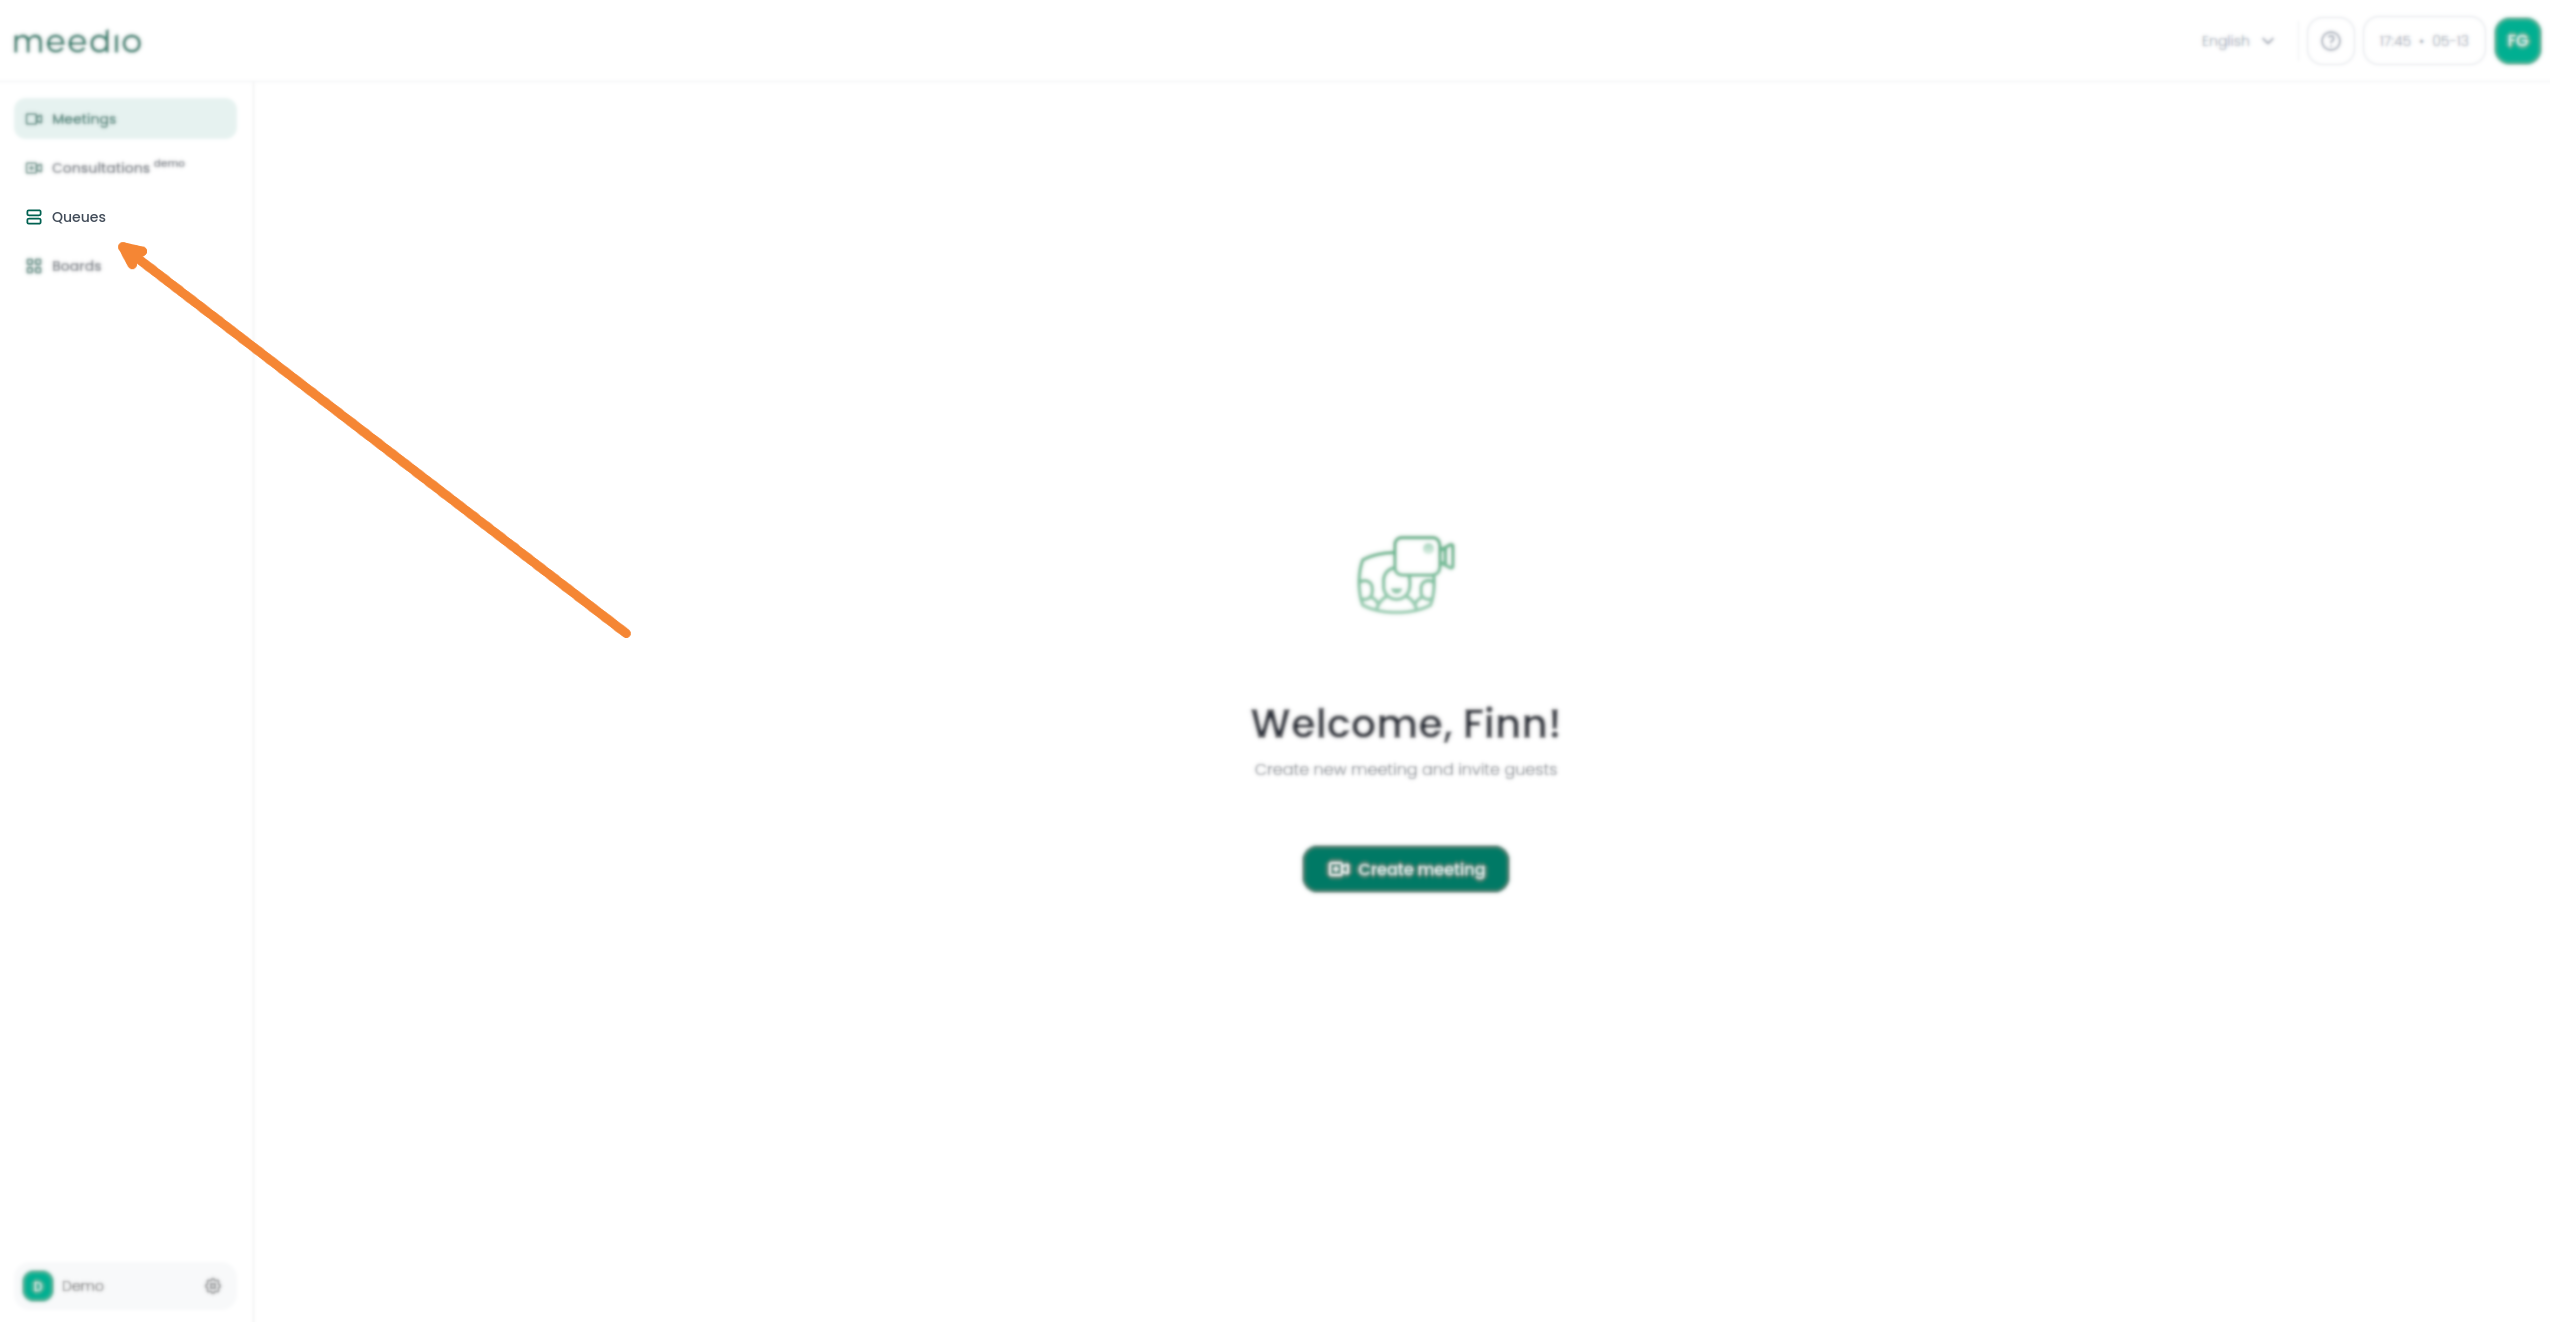
Access queues
- Press on Queues in the navigation bar located on the left of your screen below the meedio logo
Set up the queue
- Press "Queues" in the navigation bar located on the left of your screen below the meedio logo
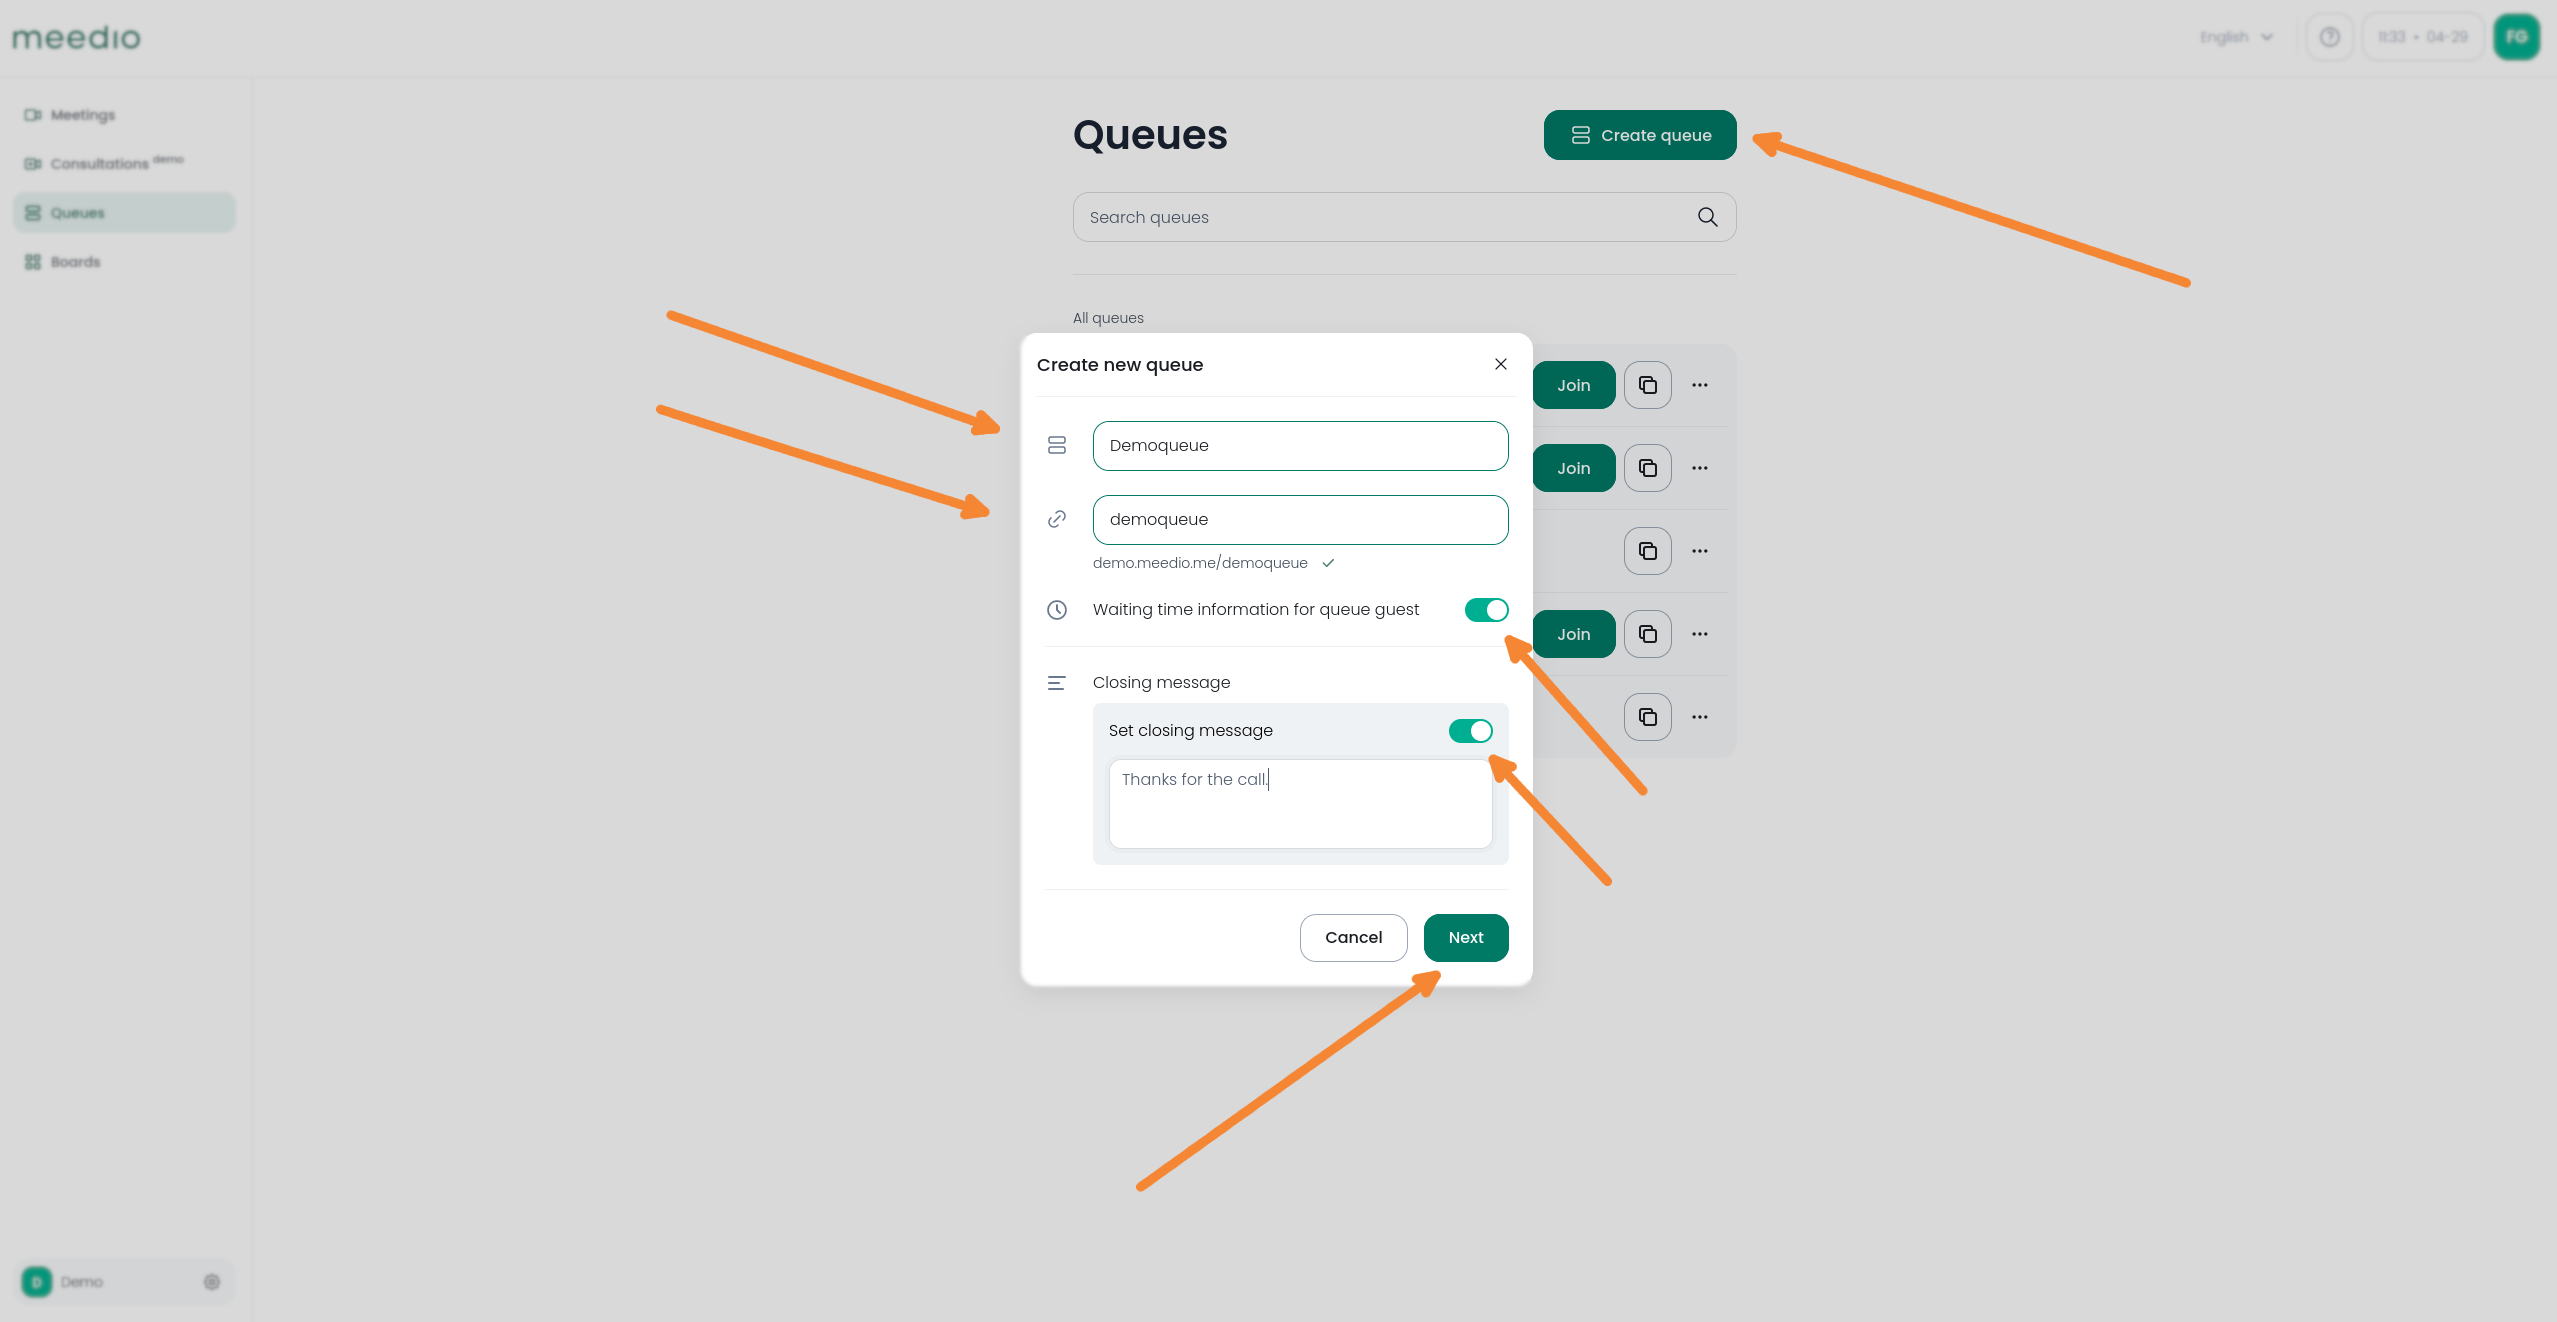
- Press the green "Create queue" button next to the "Queues" heading
- In the "Create new queue" Pop-up select your queue name and your URL ending (if left untouched the URL ending will be the same as your queue name) in the respective first and second text box
- Then you can choose to have waiting time information for the queue guest by pressing the green switch button next to "Waiting time information for queue guest" (On per default)
- Next you can choose to have a closing message for your queue guest by pressing the grey switch button next to "Set closing message" and then enter your closing message in the textbox which came up below. This message will be displayed when the queue is set to offline so you can e.g. display opening hours
- Finally press the green "Next" button
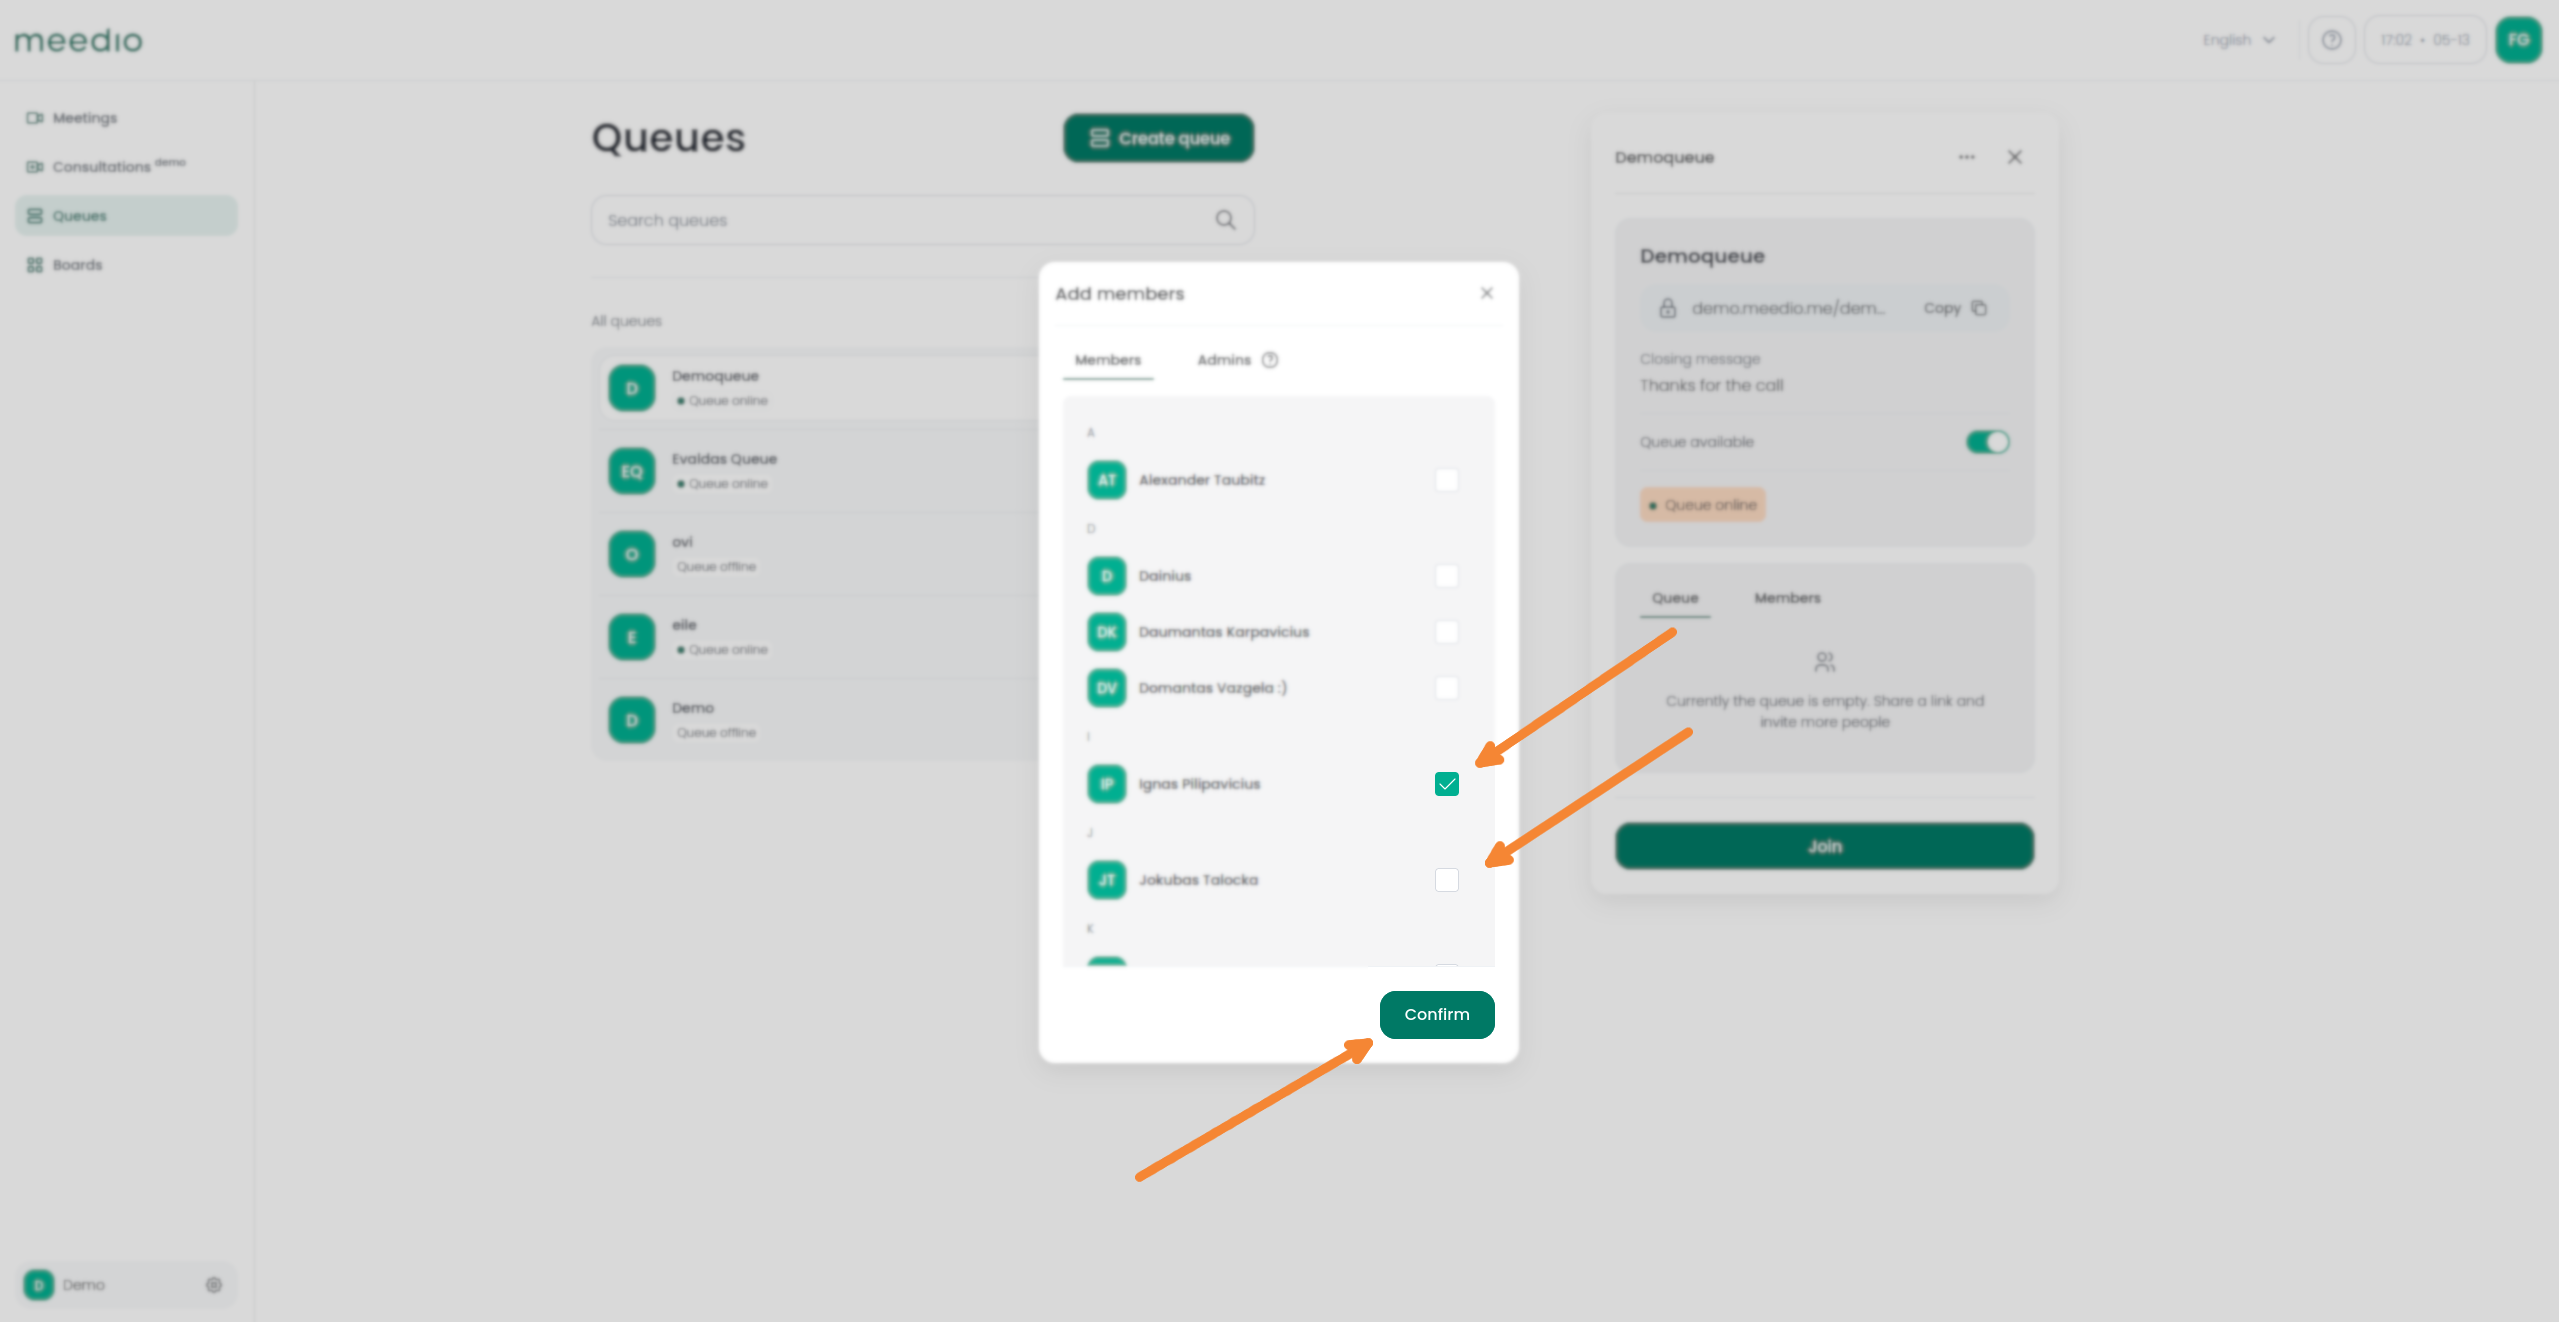
- Add all the organization members which should be able to join the queue on your side by pressing the white box next to their names (it will turn green with a check mark). Admins are selected automatically, that's why they don't show up in the member tab. Members are alphabetically sorted and you can scroll down to find them.
- Press the green "Confirm" button to finish setting up the queue
Share the queue
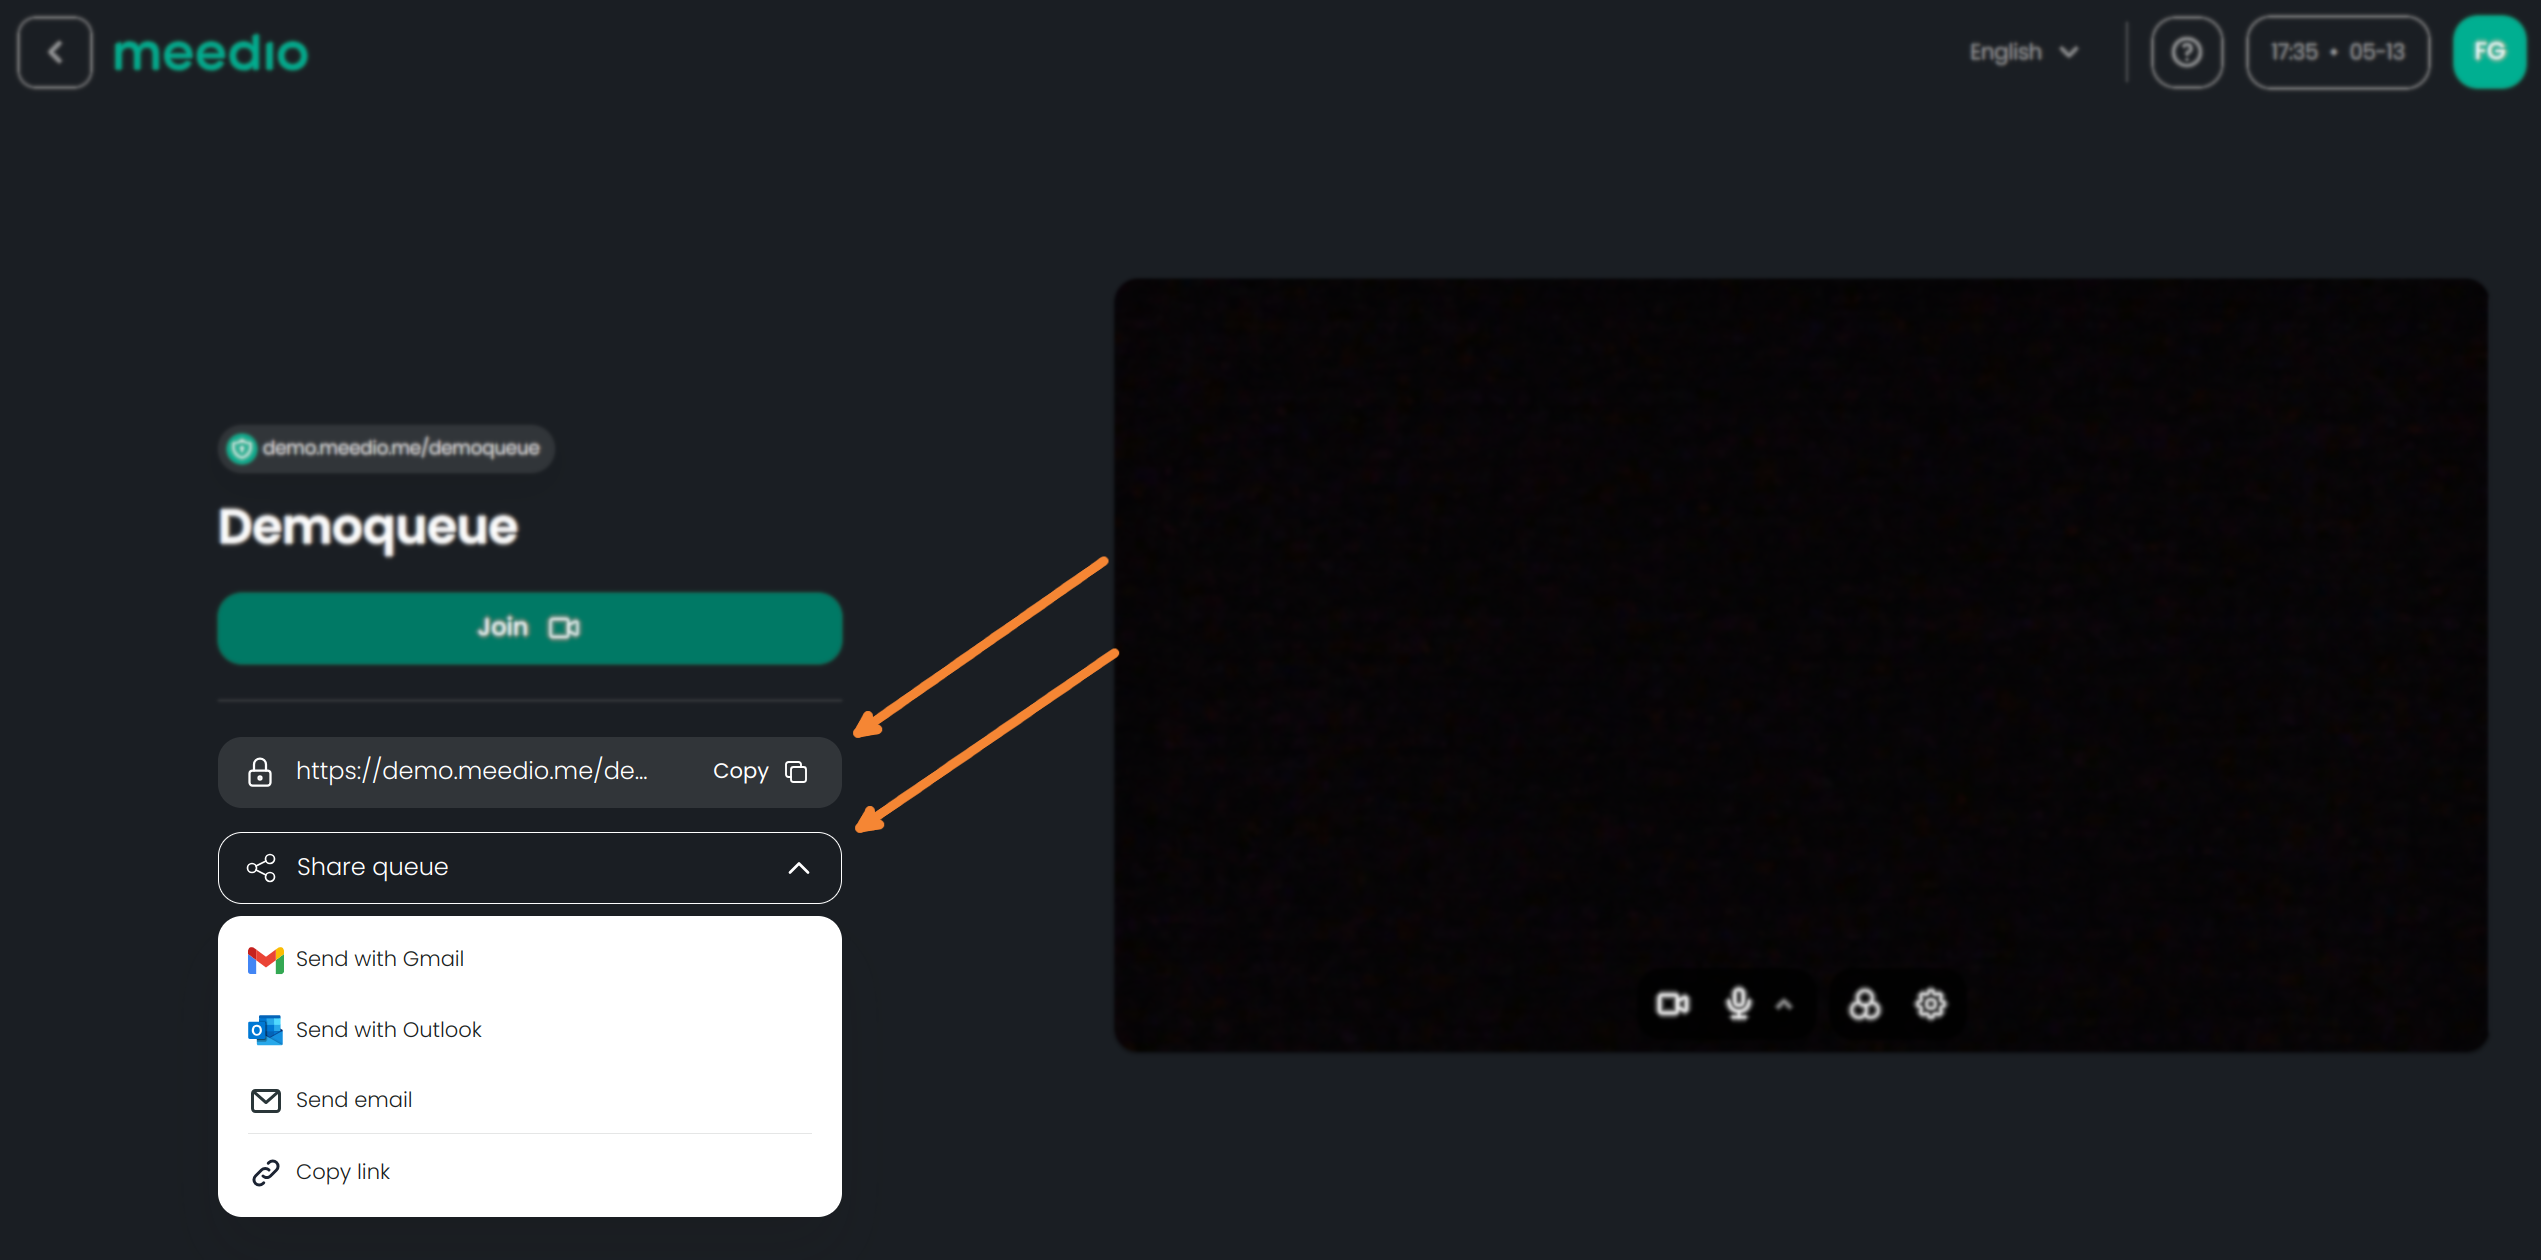
- You can invite other people to the Queue via link
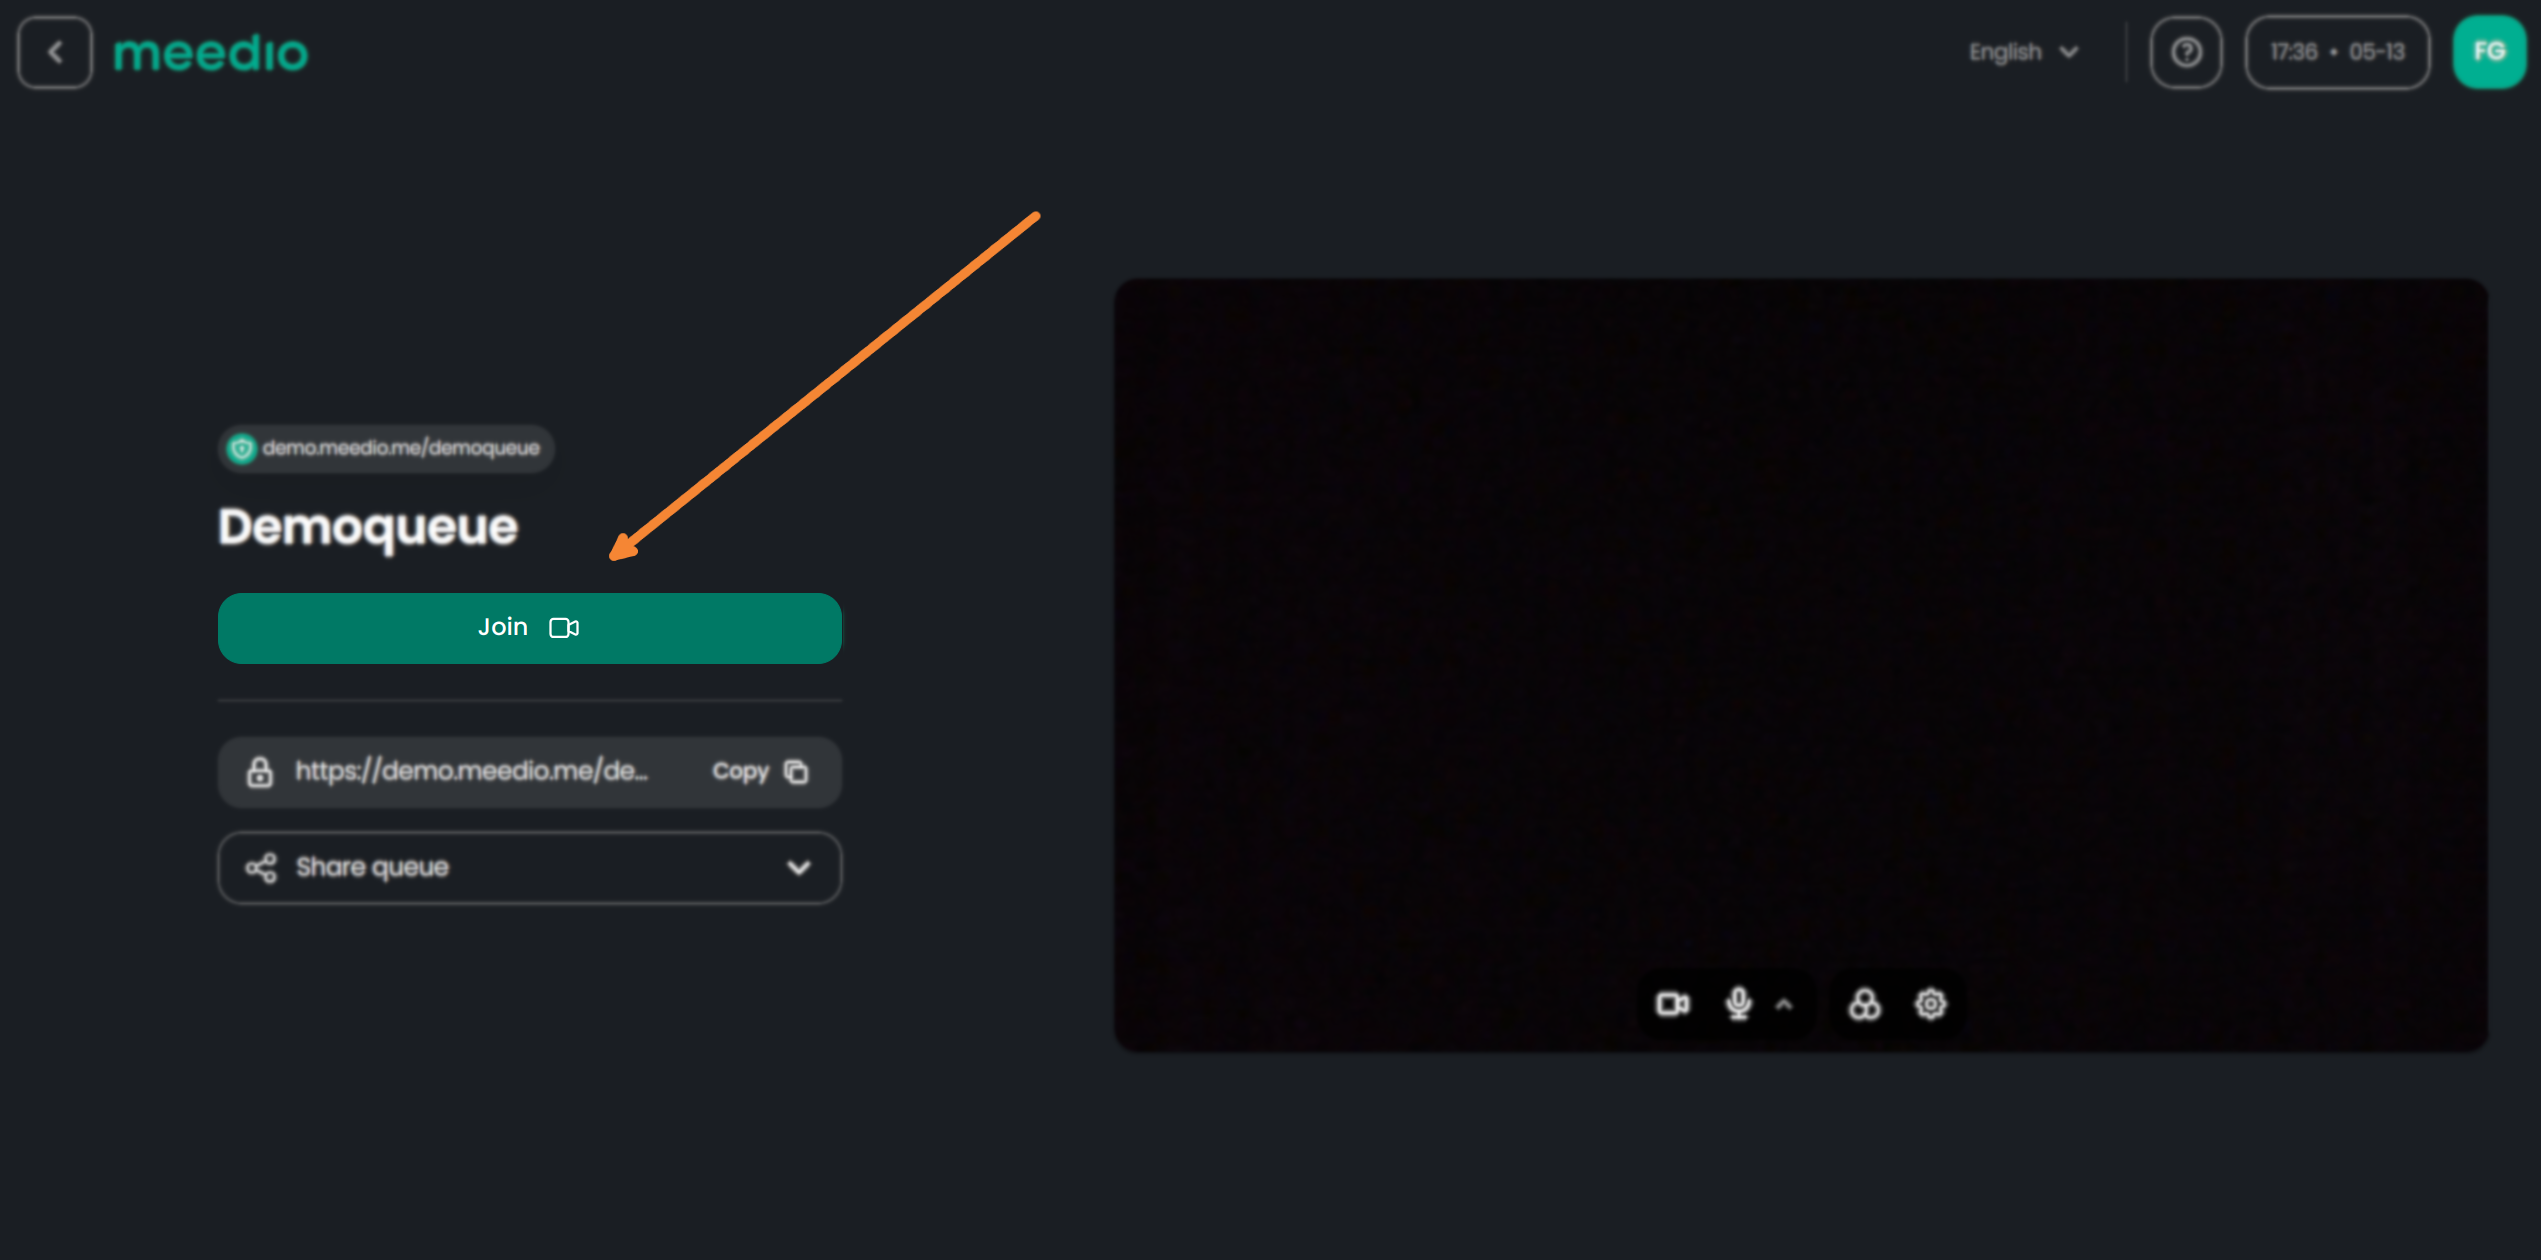
- Either copy the link directly saving a copy of the link into your clipboard by pressing the "Copy" button below the green "Join" button (after joining the queue inside the "Share queue" pop-up, or next to your video recording)
- Or send an Email with the link directly via the "Share queue" button below the URL and then select your desired Email provider
- You can also share the consultation after joining the queue by pressing the "Share consultation" button located at the bottom left of your screen and then following the previous steps

Join the queue
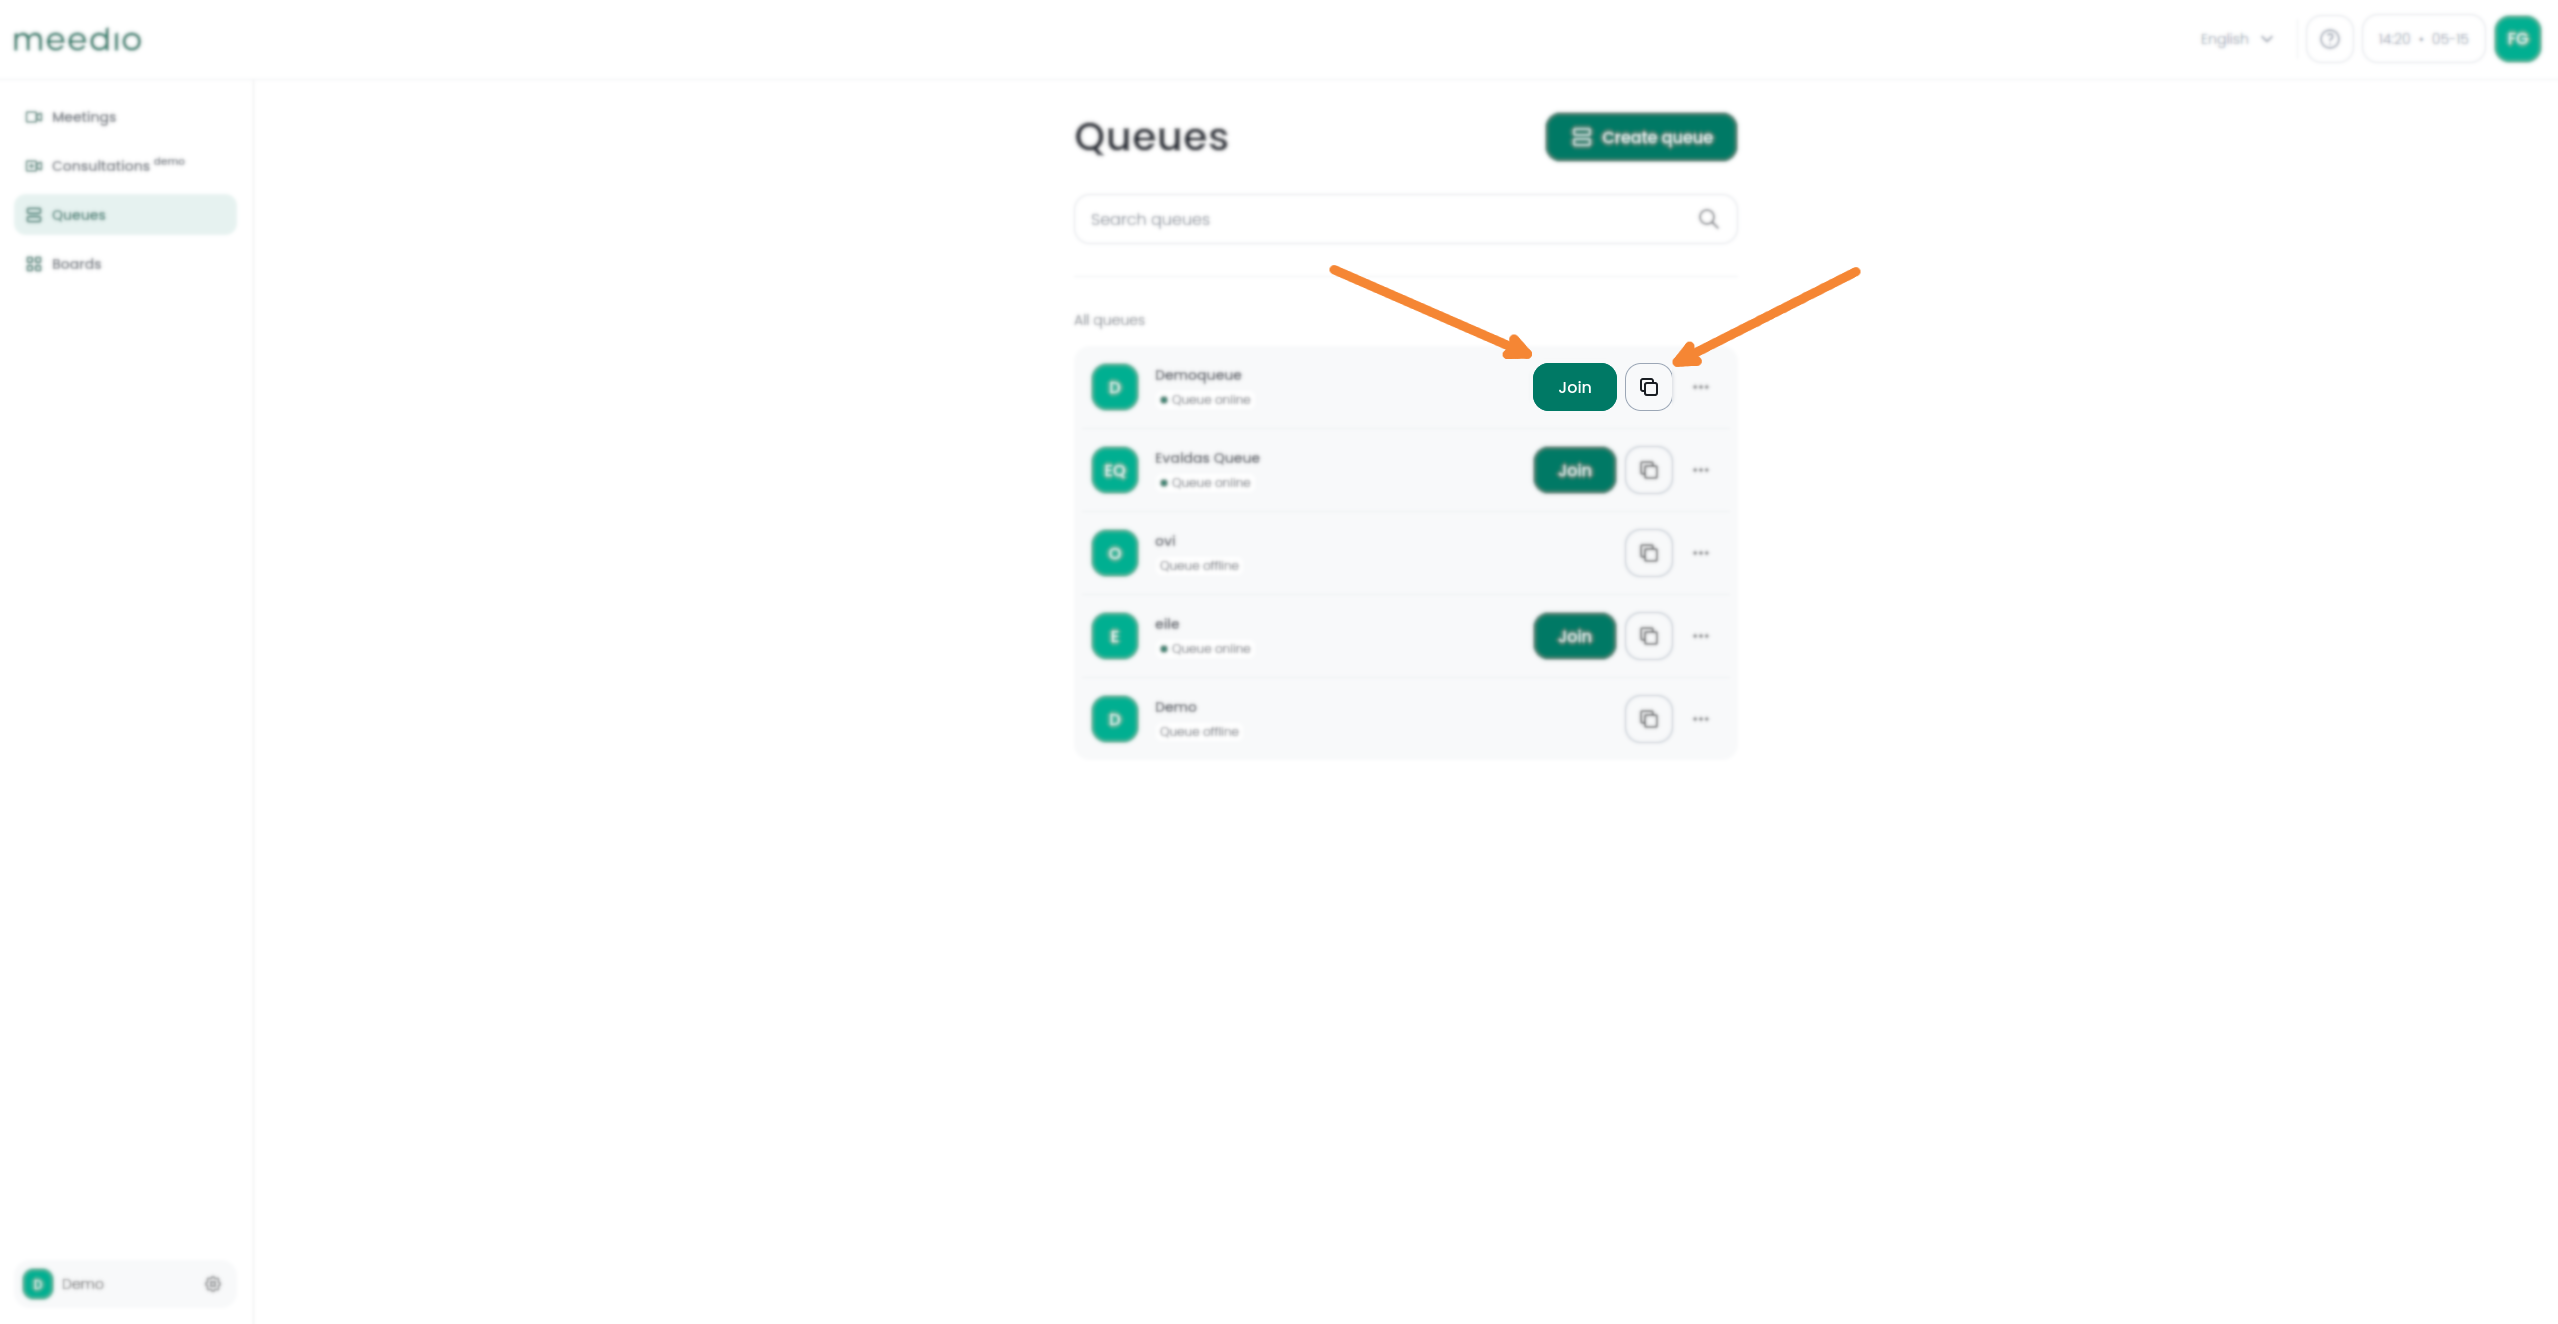
- Press the green "Join" button located on your queues overview
- Press the copy button next to the green "Join" button to copy the URL link into your clipboard
- Finally press the green "Join" button which is located below the queue name heading to enter the video call
Work with the queue
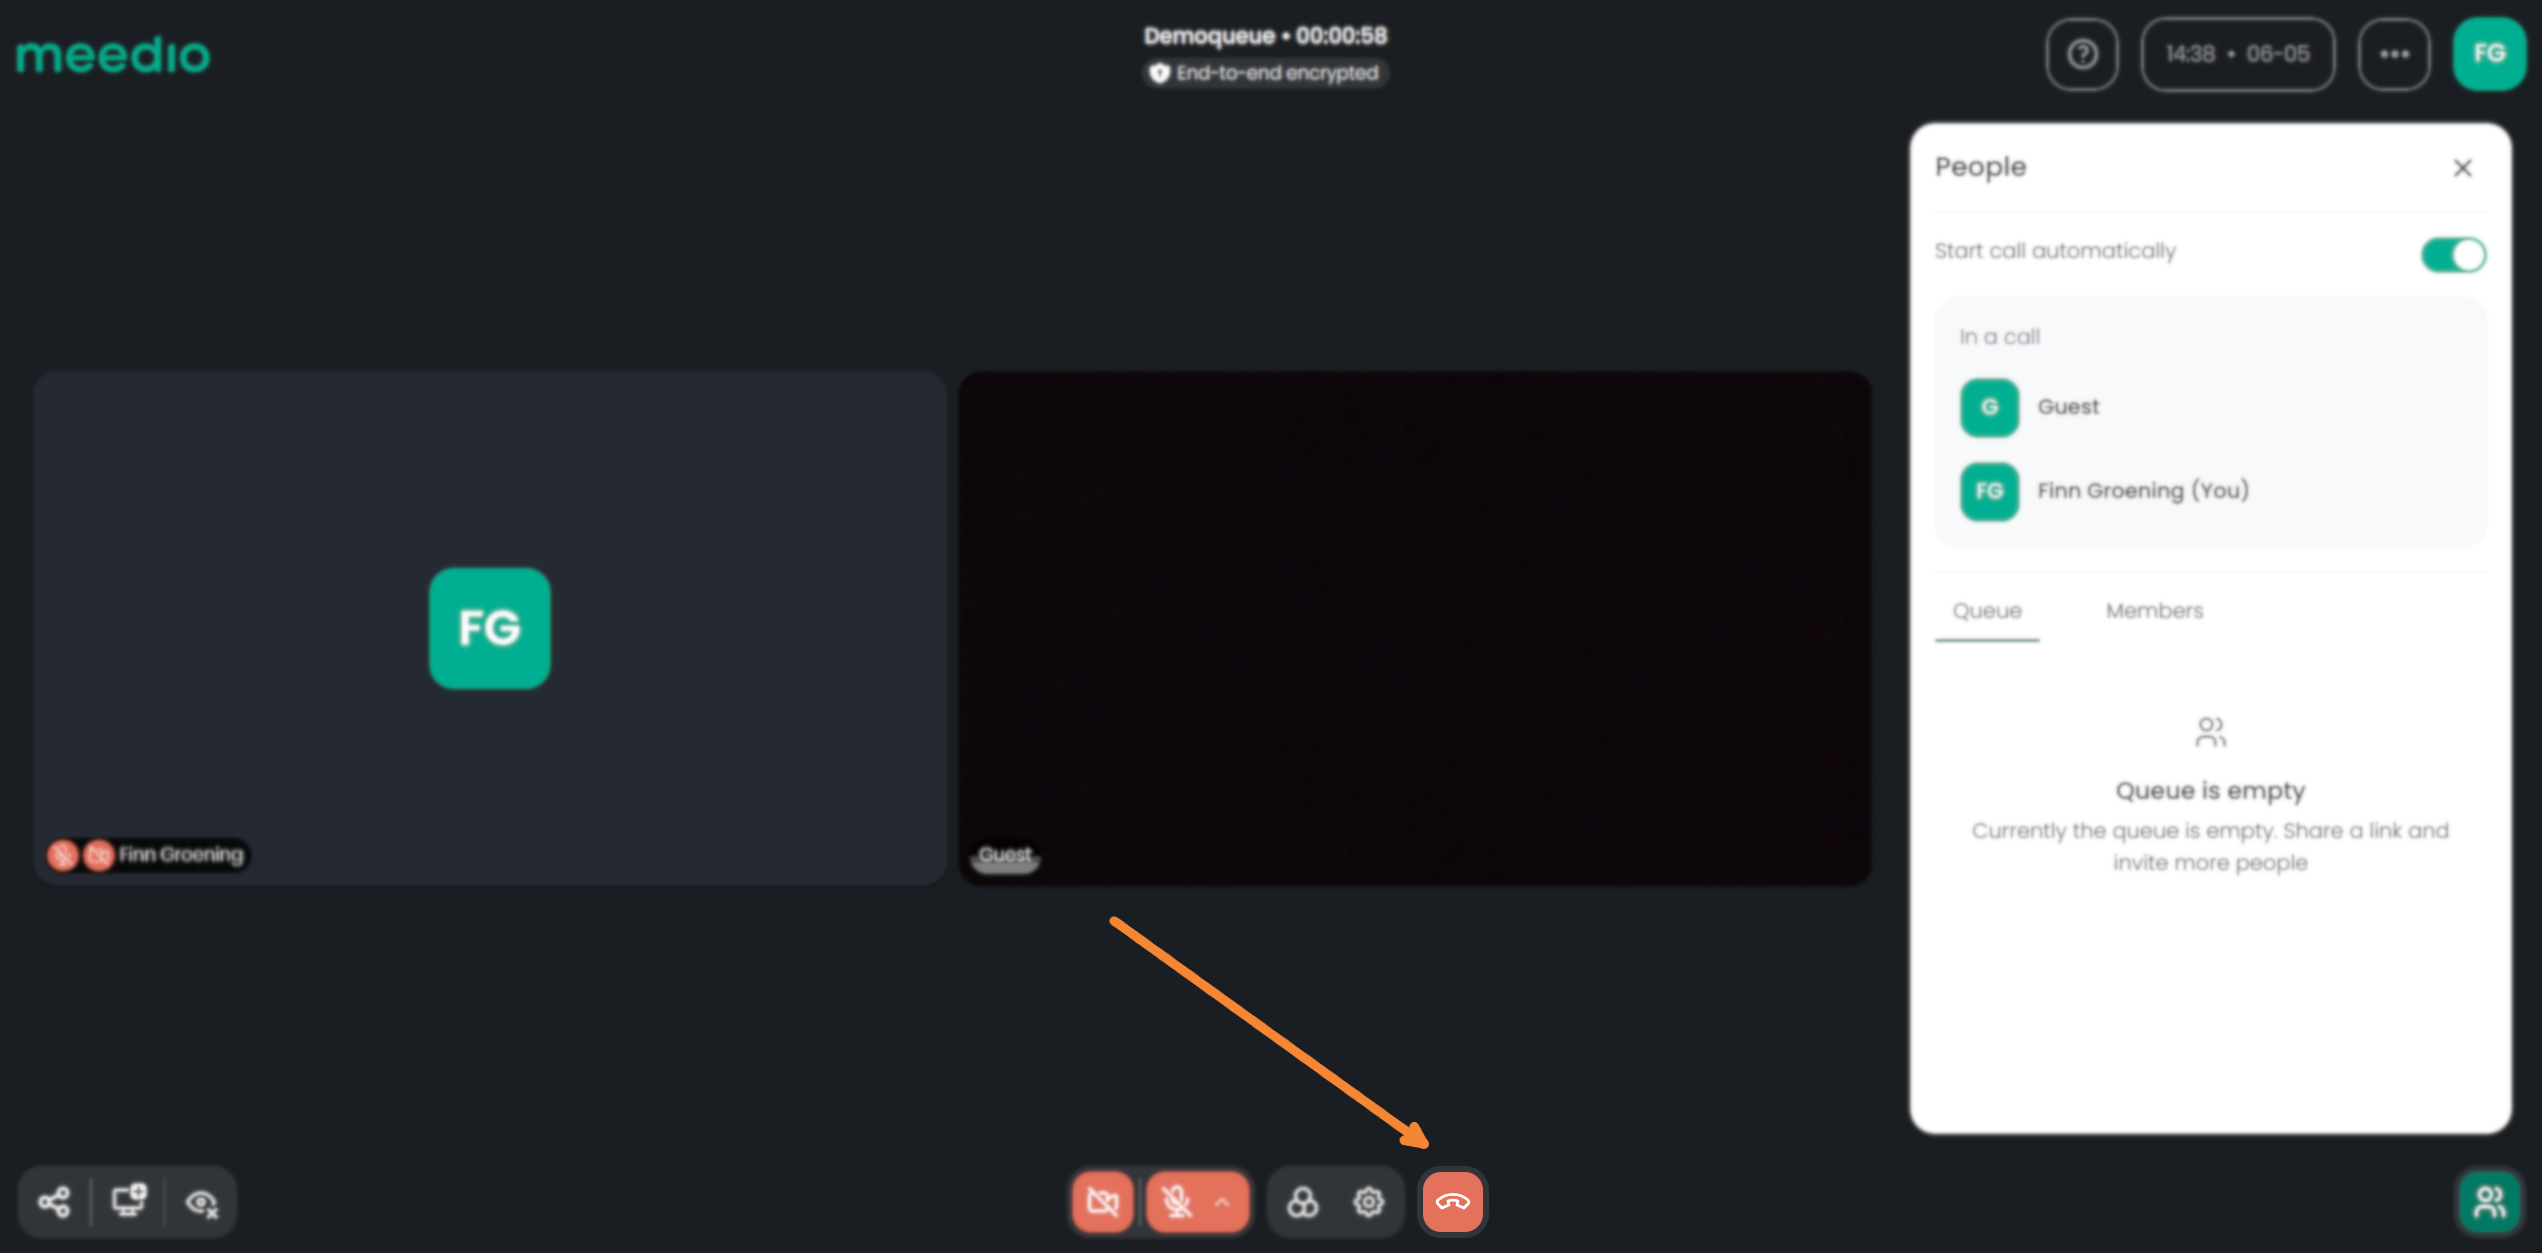
- Press the "People" button on the bottom right of your screen to get an overview of people waiting in queue (open per default)
- Press on the Start call automatically slider so once a call is finished the next one with the next guest waiting in line will start right away
- Press on the "Start call" button next to a guests name to have the person join the call with you
- Once you press on "Start call" with a new guest the current guest will be disconnected (and shown a closing message if set)
- Press the red "Hang up" button to end the call with a guest

Experience the queue
- Once you join you are presented with the pre-meeting screen for guests
- Make adjustments to your audio & video. If help needed refer to Video & Audio
- Enter the name which will be displayed once you entered the meeting
- Consent to meedio about processing your data with the purpose of establishing a video meeting by pressing the box below the greyed out "Join" button
- Press the green "Join" button to enter the queue
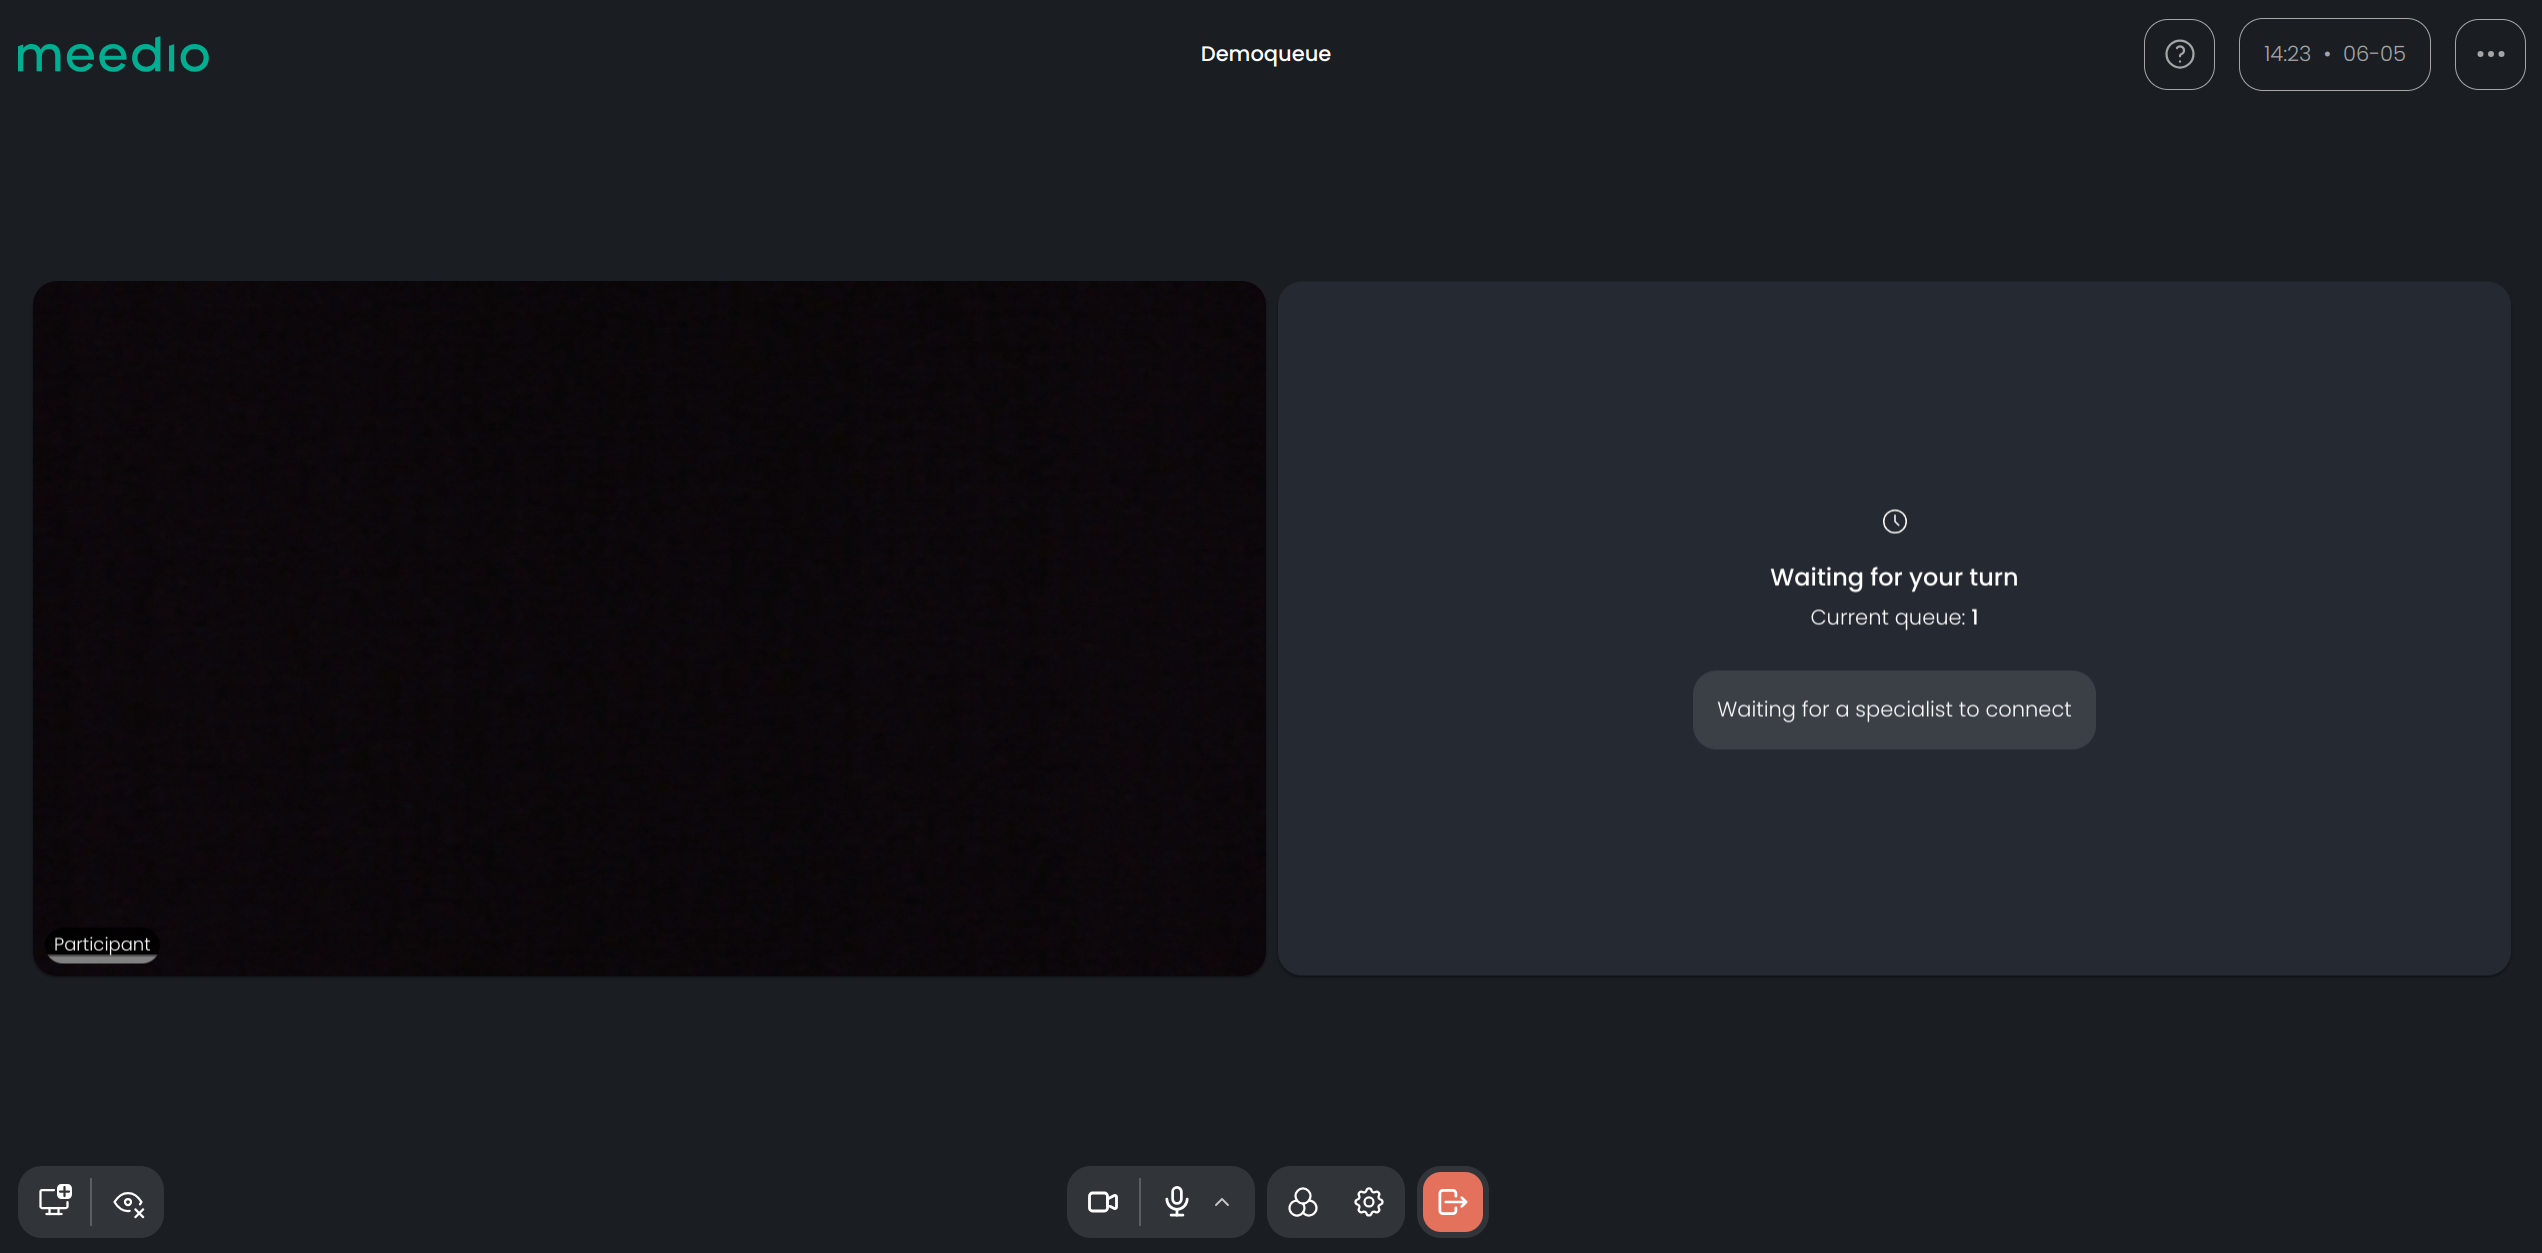
- You are now presented with the waiting screen where you can see your queue number in line and the estimated waiting time
- Once the call starts you will see the video transmission of the specialist (organization member)
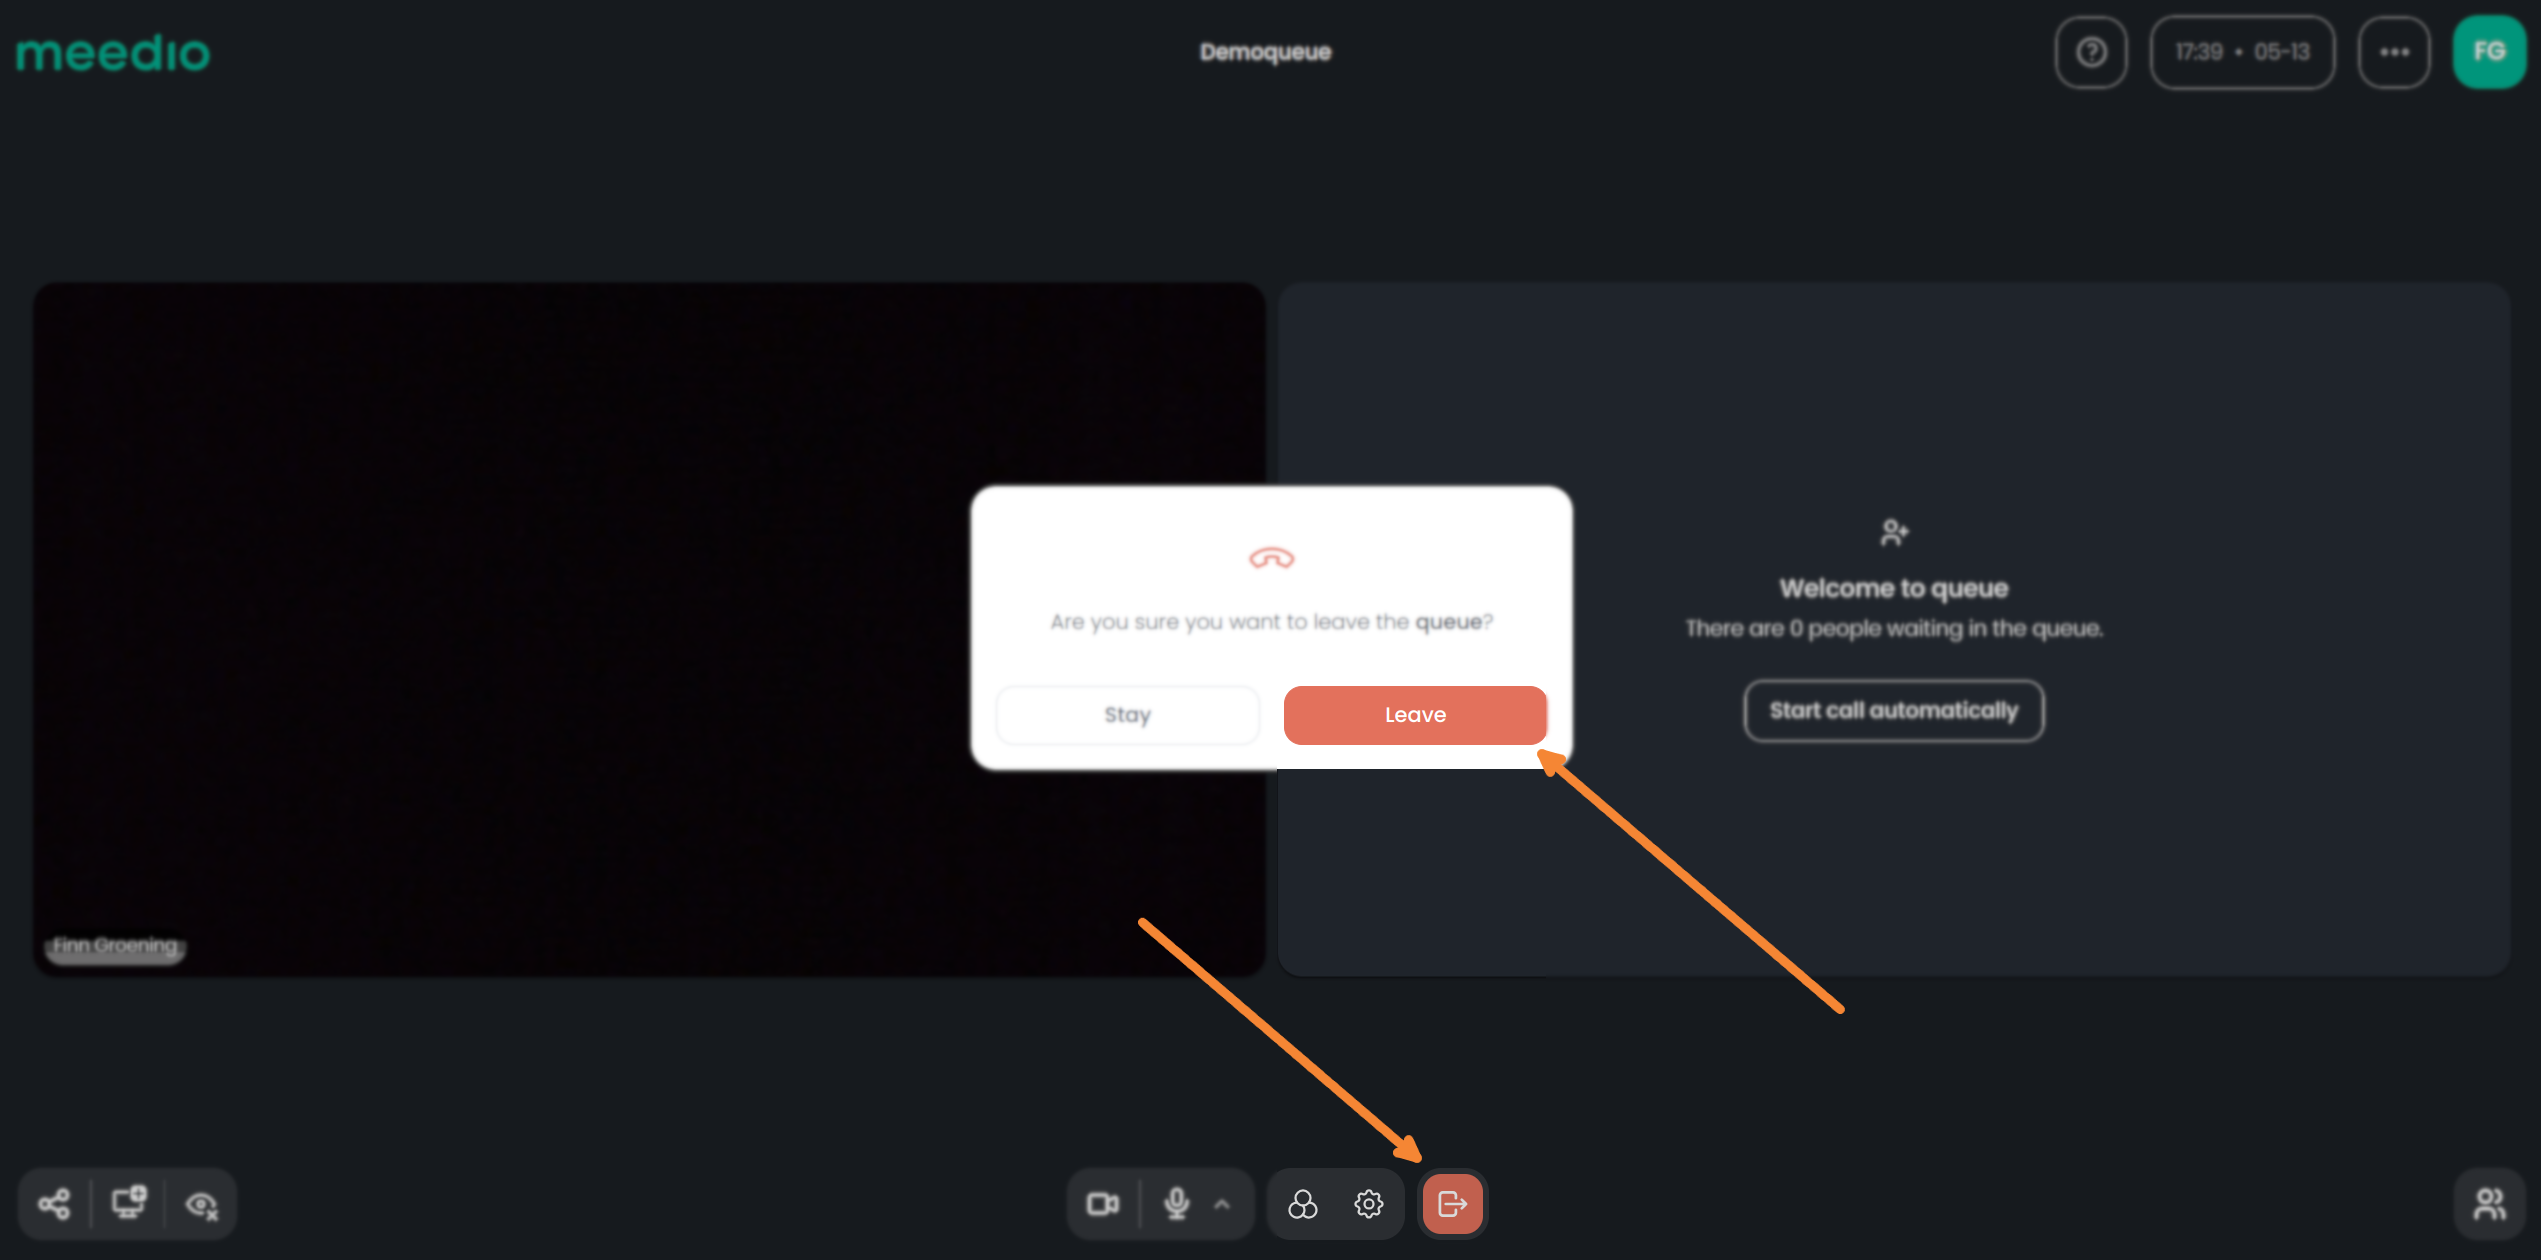
Leave the queue
- Press the red "Leave queue" button
- Confirm by pressing the red "Leave" button
- The queue will stay online unless an admin sets the queue to offline
- You can rejoin the consultation by pressing the green "Join again" button or via the queue URL
- Or go back to your queue overview by pressing the "Back to queues" button

Edit queues
Manage queue
- To manage a queue press on the respective queue
- Here you can copy a link to the queue by pressing the Copy button
- Close / Open the queue by pressing the switch button next to the "Queue available" text
- Overview guests currently waiting in the queue by pressing on the Queue tab
- See your active Organization member for the respective queue by pressing on the "Members" tab
- Join directly into the queue

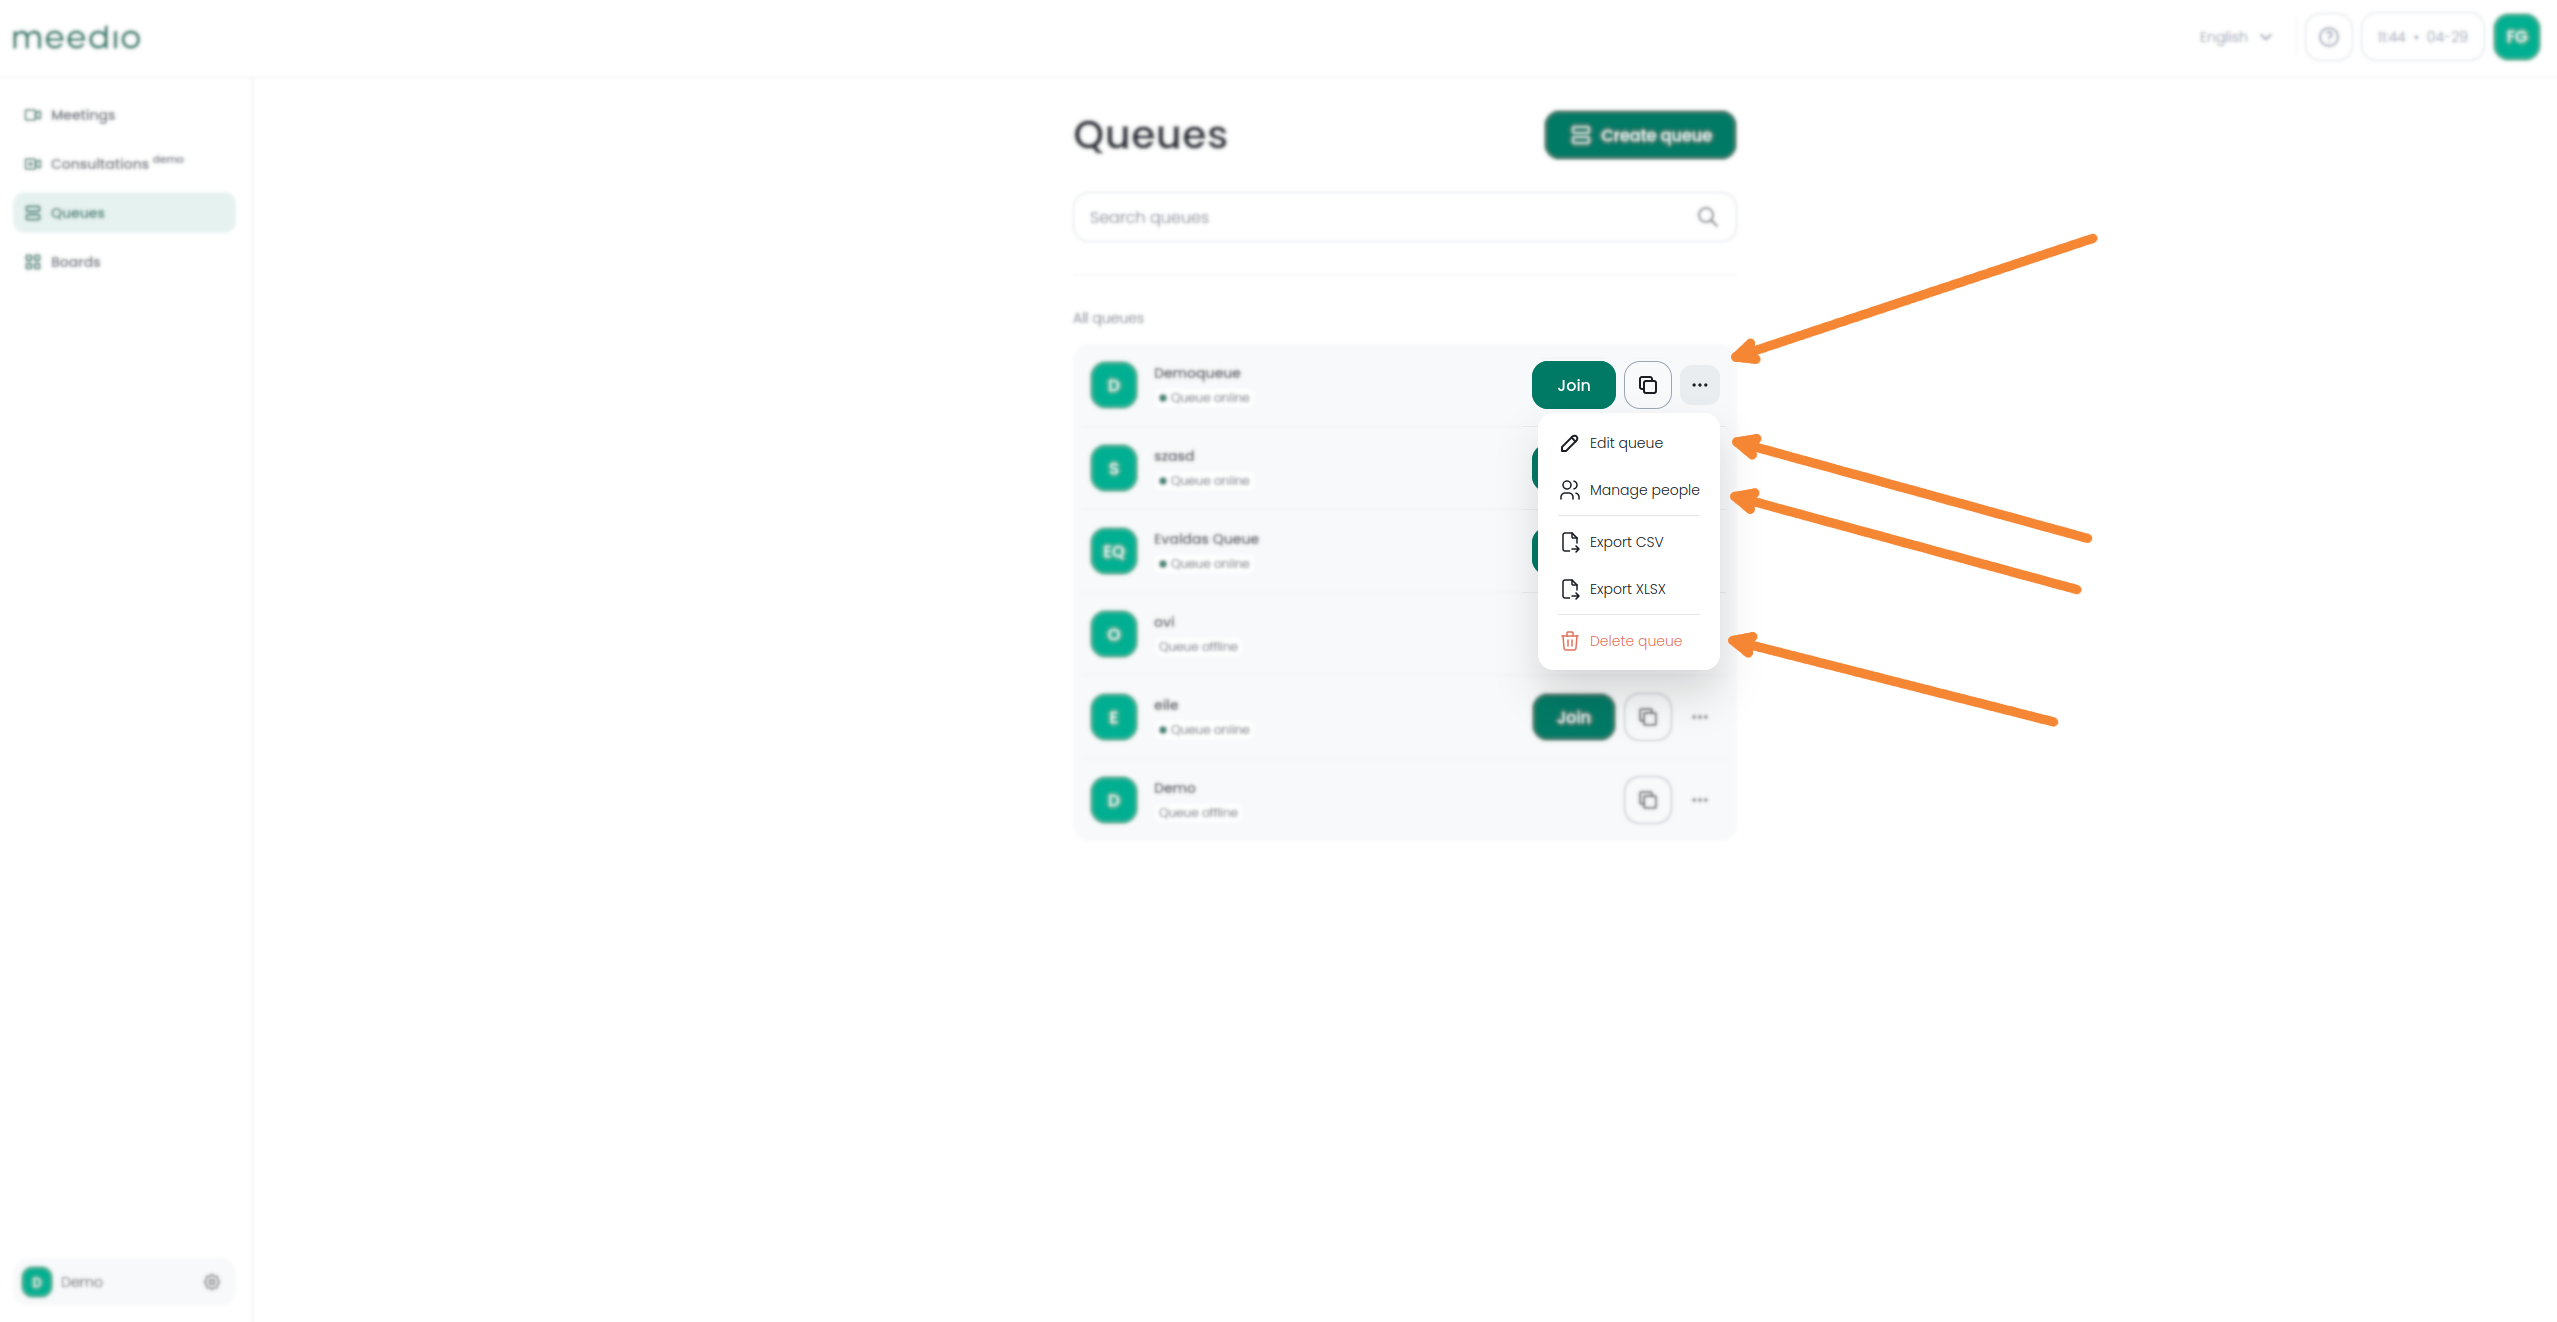
Access the queues options
- Search for your queue either manually or by searching it by name via the search bar located below the Queues heading
- Click on the "Options" button which is indicated by three dots at the right of the same row as your queue name next to the copy button
- To change the queue name, queue URL, set or change the closing message or turn on or off to display the waiting time information press the "Edit queue" button
- To manage your queue members press the "Manage people" button
- To download the queue statistics press the "Export CSV" or "Export XLSX" button
- To delete the queue press the red "Delete queue" button
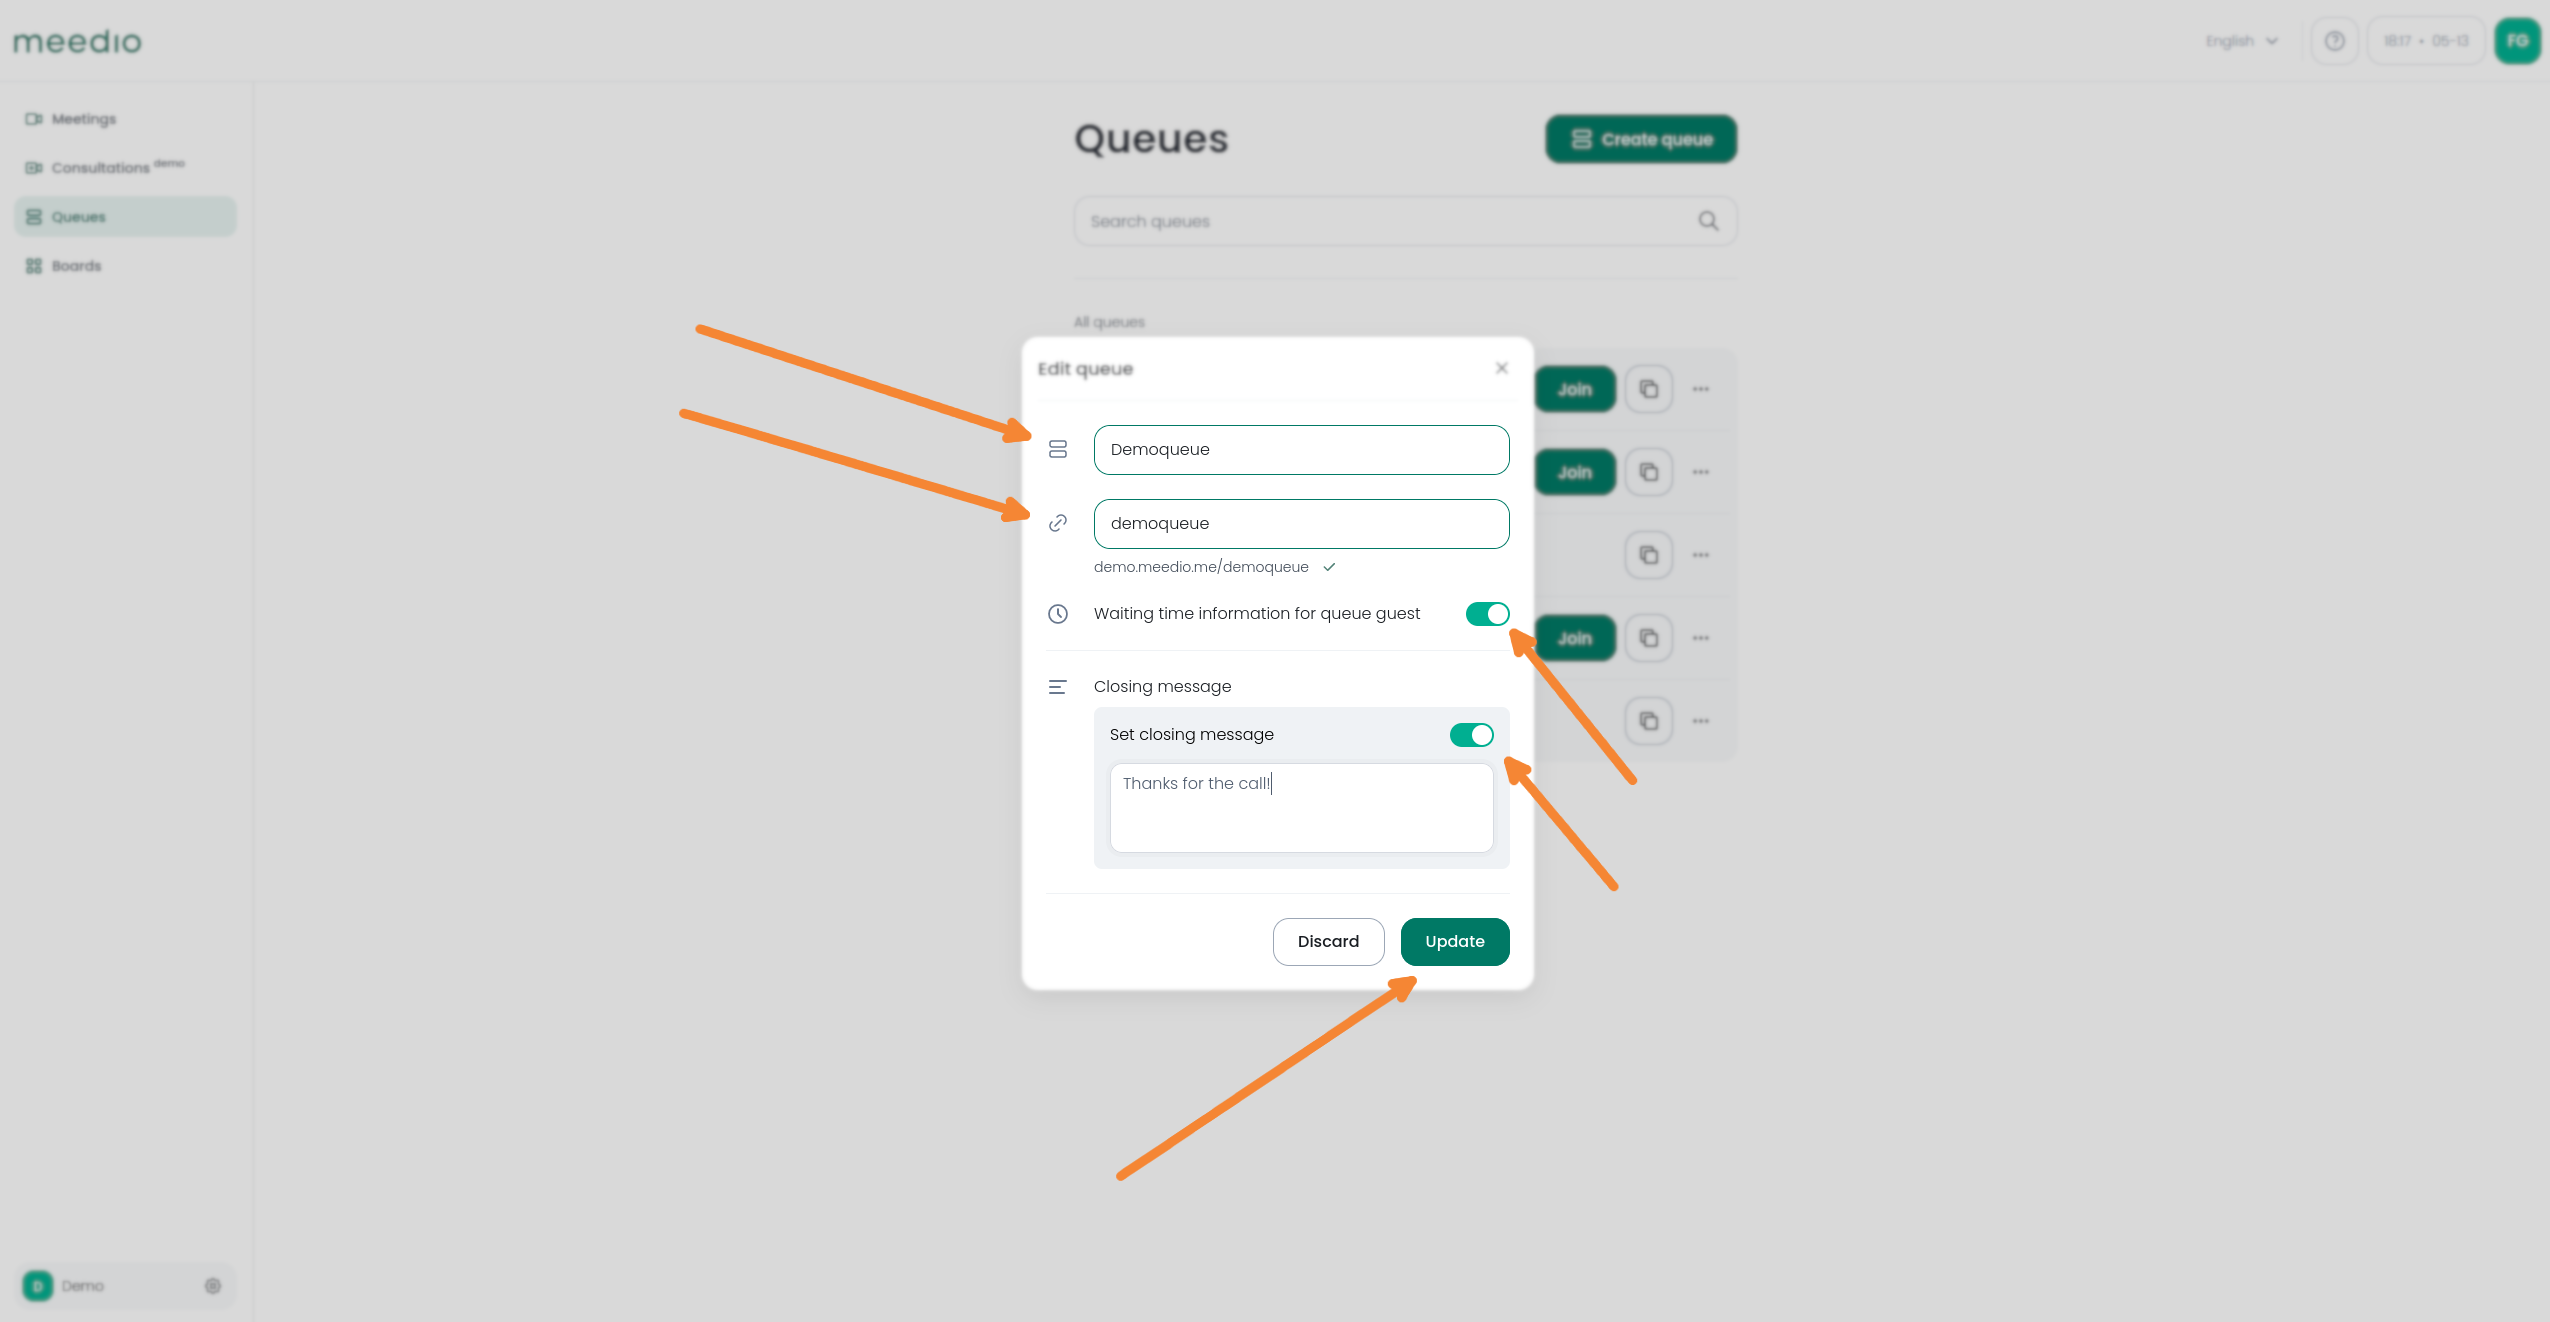
Edit queue
- In the "Edit queue" Pop-up select your queue name and your URL ending (if left untouched the URL ending will be the same as your queue name) in the respective first and second text boxes
- Then you can choose to have waiting time information for the queue guest by pressing the green switch button next to "Waiting time information for queue guest" (On per default)
- Next you can choose to have a closing message for your queue guest by pressing the grey switch button next to "Set closing message" and then enter your closing message in the textbox which came up below
- Finally press the green "Update" button for your changes to take effect
Manage people
- In the "Add members" Pop-up add all the members which should be able to join the queue on your side by pressing the white box next to their names (it will turn green with a check mark). Disabling members works similar just click the green (checked) box next to their name. Admins are selected automatically, that's why they don't show up in the member tab. Member are alphabetically sorted and you can scroll down to find them.
- Finally press the green "Confirm" button for your changes to take effect

Downloading the queue statistics
- In the queue statistics you can see the total number of calls, how many were answered, how many were unanswered, the percentage how many were answered, the average call time and the average waiting time
- Press Export CSV or Export XLSX to download the respective queue statistics as either a .csv file or as a .xlsx file (Excel)
- The download should start automatically

Delete queue
- When deleting the queue you get a pop-up which asks you to confirm to delete the queue via pressing the red "Delete" button
- Careful as the deletion of a queue can not be undone

We would appreciate your feedback.
Partnership
Visit our partner page
Find out more about becoming a partner.
Sales
Contact our sales team
We will help you to pick the perfect plan.
